Get in touch with Ebestron Company


Updated June 2026 · Reviewed by the Ebestron technical team
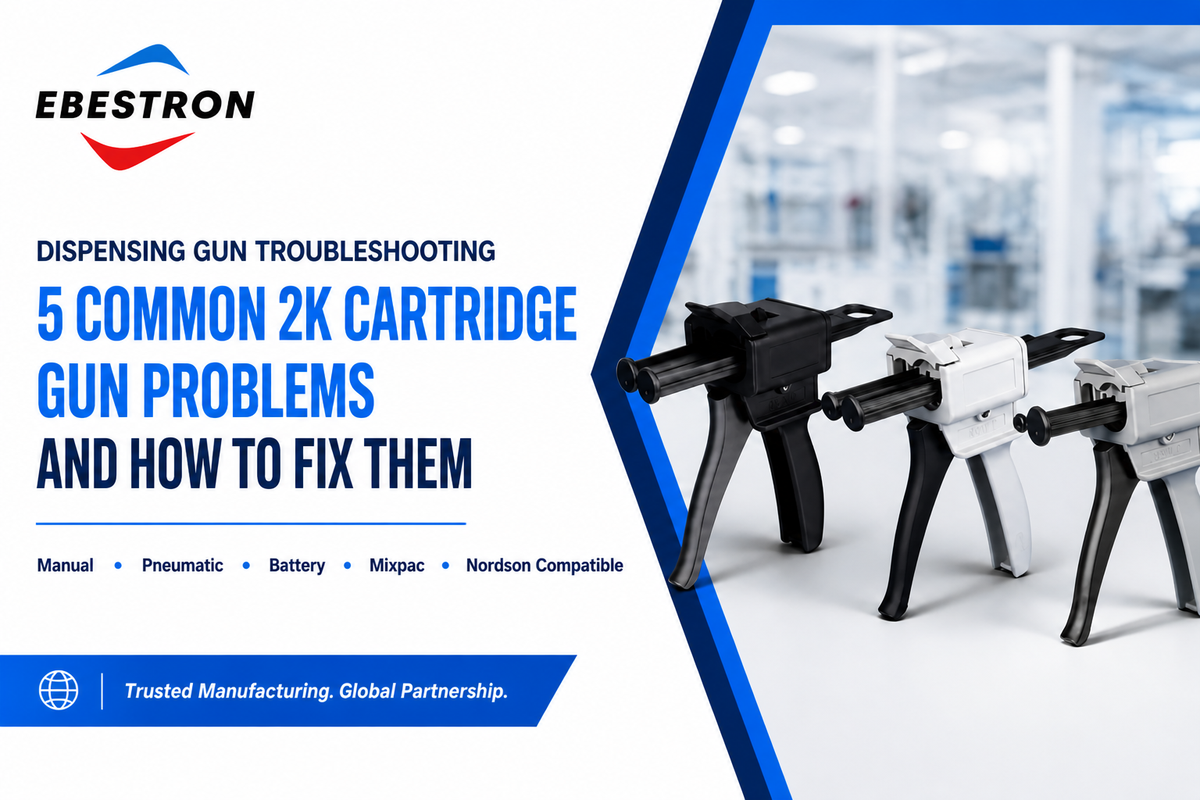
Dispensing gun troubleshooting means tracing any malfunction — no flow, a hard trigger, an inconsistent bead, an after-squeeze drip, or a clog — back to the single component in the dispensing path of a 2K (two-component) gun, then correcting it. The overwhelming majority of “broken” 2K dispensing guns are in fact fine and working normally; most stoppages trace to five common issues, and each maps to a simple in-the-shop fix. This troubleshooting guide follows each fault from symptom to cause to solution, for manual, pneumatic, and battery-powered cartridge dispensing guns and for 2K epoxy, acrylic, polyurethane, and silicone adhesives.
The 30-second triage: Squeeze the trigger once and watch three things in order — does the plunger rod advance, does adhesive reach the nozzle tip, and does flow stop cleanly when you let go? A “no” at each step points to a different zone: the drive mechanism, the cartridge or mixer, or the anti-drip release. The rest of this guide expands that triage into specific fixes.
Quick Specs, 2K Cartridge Gun Reference
| Cartridge sizes | 50, 200, 400, 600 ml (also 2–32 oz) |
| Mix ratios | 1:1, 2:1, 4:1, 10:1 (industrial systems span to 50:1) |
| Manual thrust ratio | commonly 10:1 (low viscosity) to 26:1 (high viscosity) |
| Pneumatic air supply | typically 80–100 psi, regulated |
| Static mixer length | ~18–24 elements (more elements = better mix, more back-pressure) |
Inside a 2K Dispensing Gun: The 5-Zone Dispensing Path
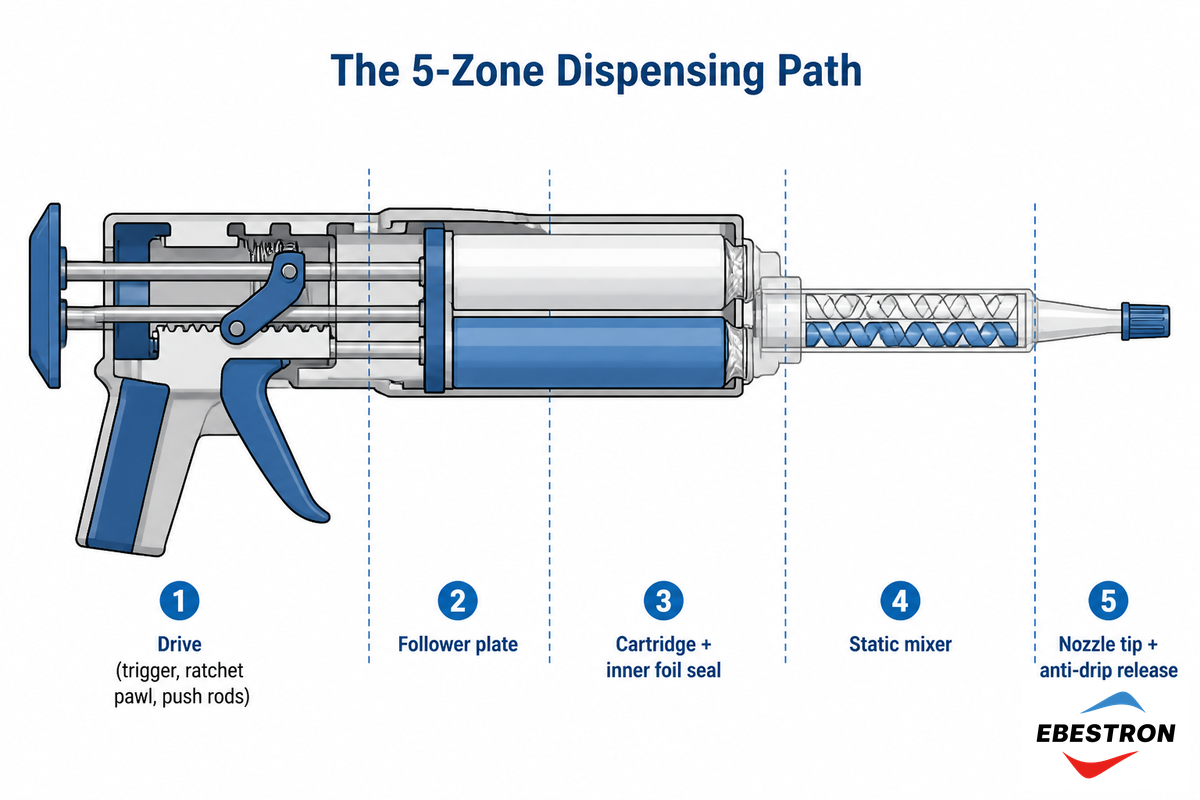
Proper diagnosis of any gun dysfunction requires pinpointing the symptom location; however almost every dispensing problem related to the use of a 2K gun will have originated in one of five segments of the dispensing path. In simplest terms, a 2K dispensing device acts as a force multiplier: a trigger is pulled and a ratchet-mechanism or smooth piston (plunger, shaft) advances one or two pistons in-board of the cartridge and into the adhesive material (the cartridge), forcing resin and hardener through (by now stepped or proportional) pistons. Each stream then enters the same nozzle (a static mixing nozzle) to combine before exiting through the gun tip. The wetted parts are mostly plastic — the cartridge body and pistons — while the drive train is metal; on automated lines a ratio pump replaces the hand trigger entirely. The trigger amplifies finger force through its thrust ratio — output force divided by applied force — which most differentiates 2K gun designs and explains why high-viscosity materials need guns with high thrust ratios. A 50 ml cartridge suits a touch-up bead while a 400 ml or 600 ml cartridge feeds a production run, and the gun’s thrust ratio — 10:1 for thin sealant up to 26:1 for thick epoxy — has to rise with the adhesive.
| Component type | Zone | Typical fault → symptom |
|---|---|---|
| Trigger / lever | 1 Drive | Under-rated thrust ratio → very hard to squeeze |
| Ratchet pawl | 1 Drive | Worn teeth or set to release → trigger feels loose, no output |
| Push rods | 1 Drive | Bent rods → ratchet slips, jam |
| Follower plate | 2 Drive→Cartridge | Not seated on piston lip → tube and press misaligned, no advance |
| Cartridge body | 3 Cartridge | Cracked or wrong format → leak past plunger |
| Inner foil seal | 3 Cartridge | Not pierced → nothing comes out |
| Retainer cap | 3 Cartridge | Left on → no flow |
| Static mixer | 4 Mixer | Cured residue → clog; throttling → drip/tail |
| Nozzle tip | 5 Tip | Hardened plug → difficult to dispense, uneven bead |
| Anti-drip release | 1 Drive | Missing / not engaged → run-on after release |
Synthesis based on manufacturer dispensing guidance and USPTO caulk-gun mechanism patents.
📐 Engineering Note — reading the thrust ratio.
This relationship, thrust ratio, is nothing more than mechanical advantage-it has nothing to do with a gun’s output power. For example, a gun with a 18:1 ratio provides, approximately, 18 units of force at the cartridge piston for each unit you press your finger to the trigger; on a 10:1 gun you get only 10 units. And thus, if you’re applying a thick 2K epoxy that needs significant piston force to overcome viscosity, on a 10:1 gun your finger does the lion’s share of that pushing effort. That job which resists the flow so vigorously is pushing your finger, not the gun. So the first thing to ask when a job fights back is not “Is the gun broken?” but “Does this gun’s thrust ratio match this adhesive’s viscosity?”
Problem 1: Nothing Comes Out (No Adhesive Flow)
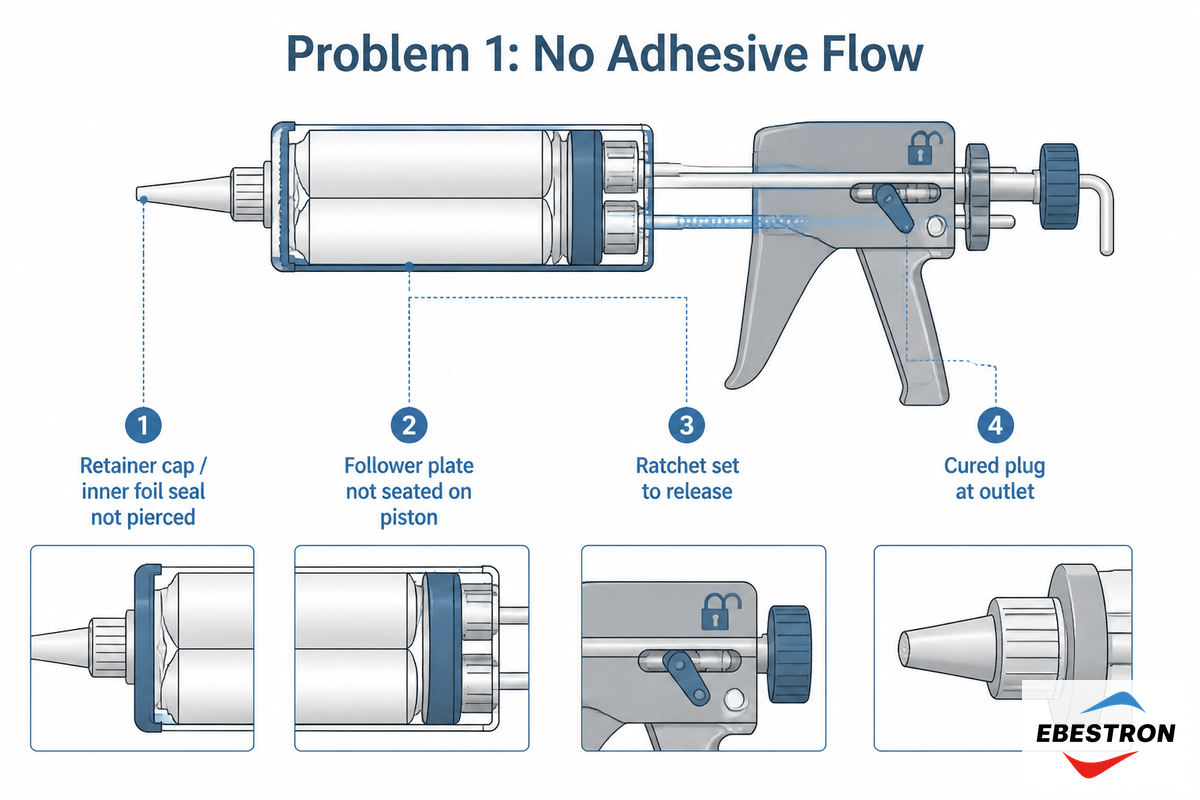
Where a person’s application of finger pressure meets absolutely no response-no adhesive is dispensed-the answer, almost always, is one of the following four items, listed here in order: (a) retainer cap and/or foil plug is left in place; (b) the follower-plate mechanism has lost engagement with the cartridge piston (or rod); (c) the trigger/ratchet mechanism is set to “release; or (d) the cartridge mouth has a dried-up clog. Address, in this order, from lowest to highest, cost and/or difficulty to fix: each of the possible causes before condemning the gun itself or its consumables.
- As discussed, ensure the follower retainer cap and the adhesive (cartridge) material’s end-foil (if applicable) are removed prior to usage, as it can lead to uneven or inconsistent product flow, potentially caused by blockages preventing piston movement or compromising material dispensing. Once you puncture the inner foil seal and cut away the plastic stopper, the pistons at the bottom of the barrel should sit level, with no warping or leaking.
- Detach the dispensing nozzle and attempt to dispense straight from the muzzle end of the cartridge. if material flows from the cartridge mouth but not through the nozzle, the static mixer is at least partly clogged and needs replacing; otherwise the problem is upstream of the nozzle, in the cartridge or drive.
- Watch that the follower plate actually seats on the rim of the piston. What we most commonly see fail in the field is that the tube and the press are misaligned, so the plunger is driving into the sidewall of the cartridge, rather than against the piston.
- If you see material exuding from the cartridge, but not exiting through the nozzle, suspect a clog, or adhesive that’s too thick for this mixer (see Problem 2).
Why does the trigger feel loose but nothing is being dispensed?
A mushy trigger with no output is a drive-zone fault: the ratchet pawl is not grabbing the drive rods — the trigger-and-plunger geometry of US patent US4081112A. The rod may be flipped to a no-click orientation, or the pawl teeth are worn. Reseat the rod so the pawl grips and inspect the teeth; a bent rod jumps the ratchet under load and must be replaced, not lubricated — the classic caulk guns “not working” complaint.
Problem 2: Clogged or Cured Nozzle (Hard or Impossible to Dispense)
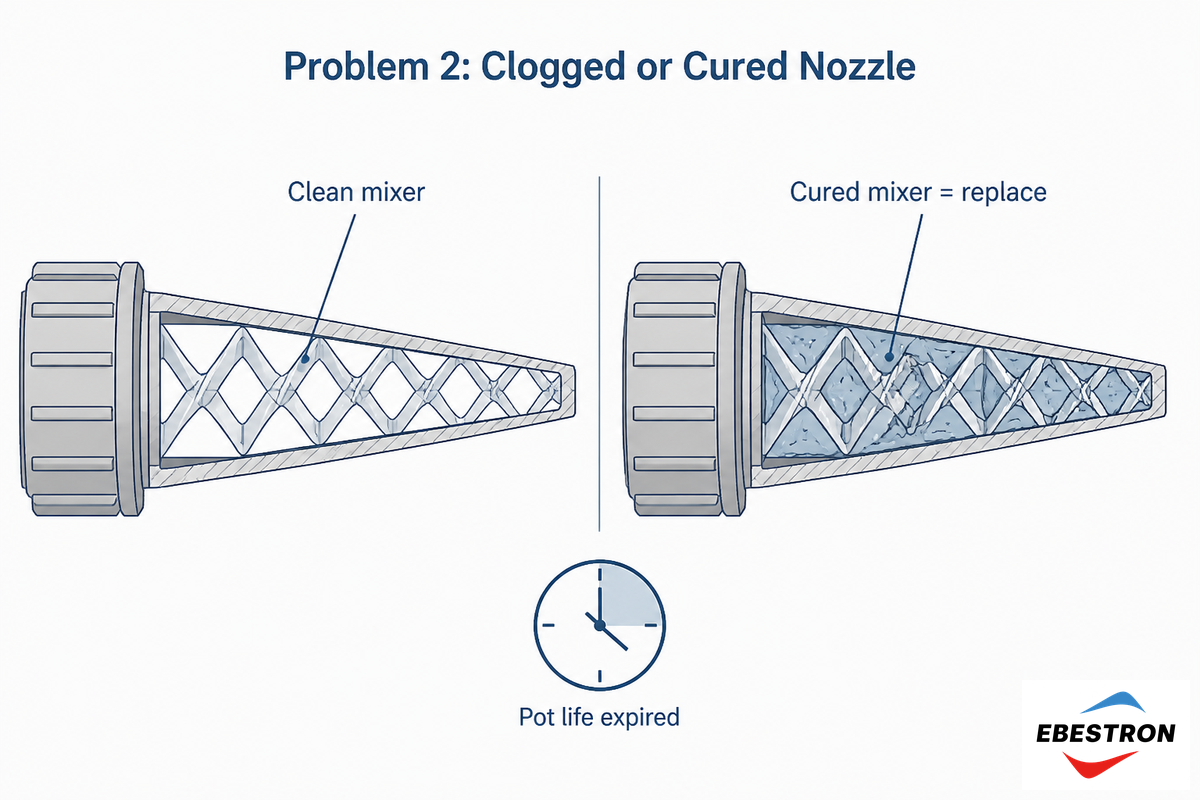
A clogged 2K gun is almost always a cured mixer, not the gun itself. Since most multi-component adhesives cure from the moment the resin and hardener meet inside the mixer, when a mixer is left standing after the pot life has expired, it’s become solid and won’t clean. This simply means the nozzle must be replaced, never force or drilled-driving a hardened mixer can cause failure at the cartridge attachment.
Working time has an absolute shelf life: the pot life. Adhesive manufacturer’s guidelines offer a useful visualization. For a resin-and-hardener pair with a 10-minute pot life at 23 °C (73 °F), the mixer runs roughly 10 minutes before gelling; in a hot 31 °C (87 °F) shop that drops to about 5 minutes. For reference, the newest edition of ISO 10364, “Structural adhesives — Determination of the pot life of multi-component adhesives,” standardizes this measurement. What you’ll find printed on a datasheet isn’t a guideline; it’s a tested value — and the pipeline and nozzle must be wide enough to carry that adhesive before it gels.
⚠️ Important
What we call a solvent soak — a tip soaked in solvent, or wiped with the cleaner — only clears uncured residue stuck on the cartridge opening or tip threads. It cannot save a mixer whose internal element has already gelled. If it’s hardened up, toss it and use a new mixer. Keep a fresh one within easy reach so that when your mixer finally goes hard, you can swap it out without taking a 30-second break.
Problem 3: Uneven Bead or Off-Ratio Output
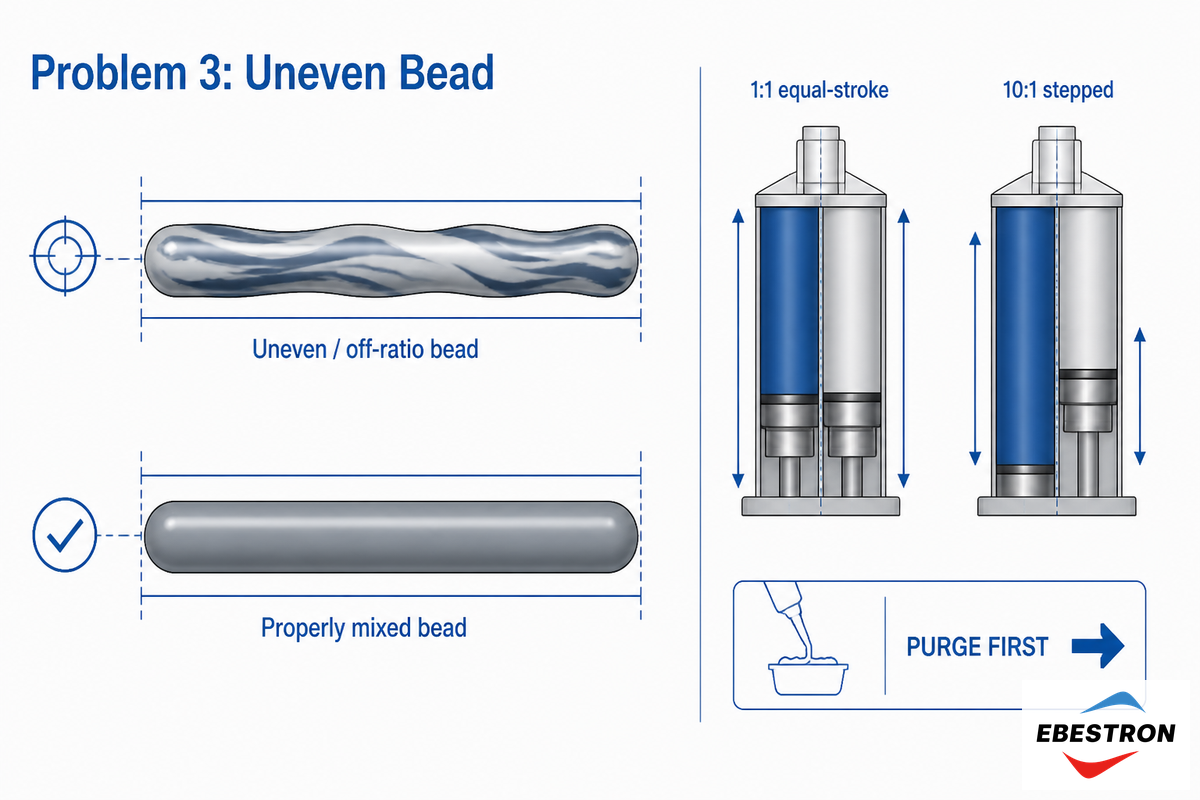
Disparity-whether it’s varying color along the adhesive line, or a bead that cures at some points while remaining tacky at others-will more likely point to either a problem with how the mix or balance of your gun, cartridge, or mixer are functioning than it’s with the adhesive itself. The first step should always be to purge. Since, by their nature, the pistons of a new cartridge don’t start off completely in sync, the first discharge will be disproportionately filled with either the resin or the hardener, so run about an inch of output onto a paper towel before proceeding with actual dispense. If color variations persist, work up the gun.
“If the viscosity difference between the resin and hardener is too wide, one material will run out too quickly and the other too slowly, and proper mixing won’t be possible.”
- Ratio mismatch: check cartridge ratio (1:1, 2:1, 10:1) against gun. Using a 10:1 cartridge in a 1:1 gun forces two equal-stroke pistons against a stepped cartridge and starves one component.
- Trapped air: an air bubble in one barrel produces a spitting, intermittent flow of air-laden mixture. Keep purging until both barrels flow smoothly — a typical 2K bead runs about 4 mm to 20 mm wide depending on the tip, so a missing 4 mm stretch is easy to spot.
- Insufficient mixer elements: short mixers are unable to ensure proper homogenization for higher ratio or high viscosity mixtures. Choose mixer length matching the product viscosity.
If the bead is still off after the gun, cartridge, and mixer all check out, the cause has moved into cure and ratio chemistry — covered in our companion guide to two-component dispensing gun selection and 2K dispensing equipment problems.
Problem 4: Dripping and Run-On After You Release the Trigger
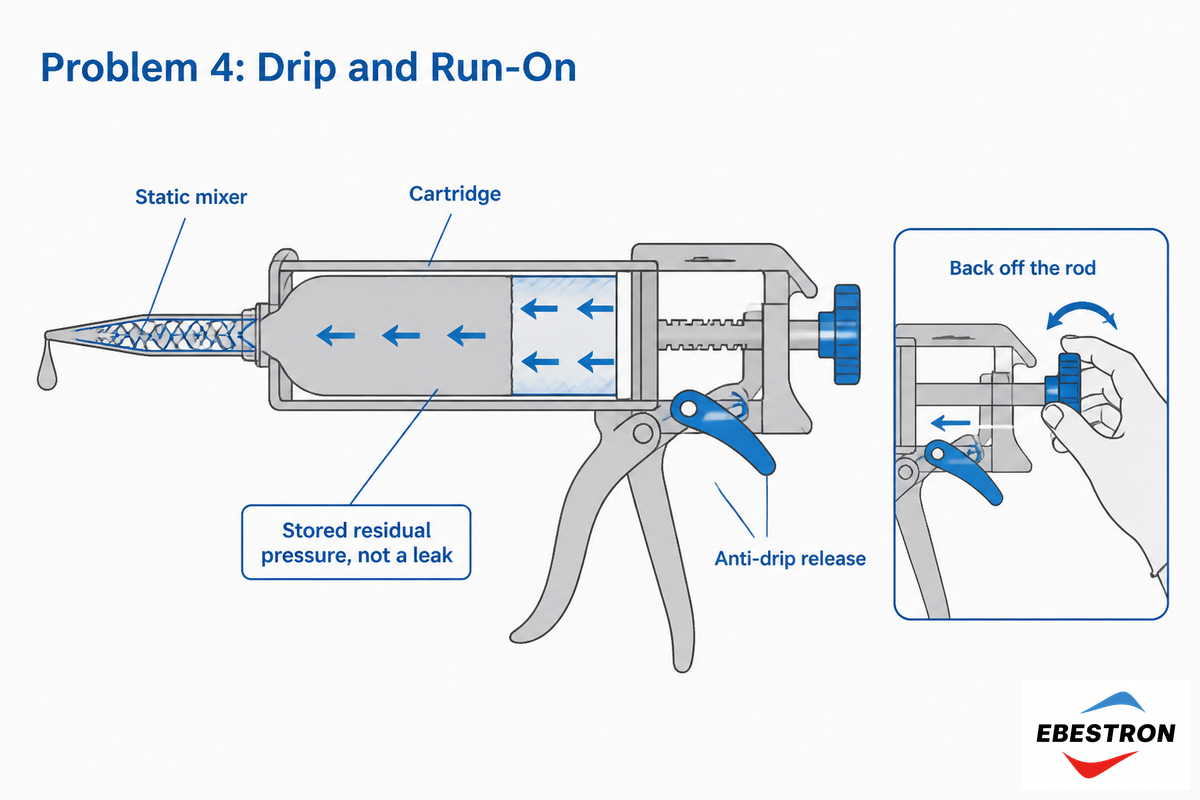
Post-release drip is not a seal leak — it is stored pressure. This is the Run-On Residual-Pressure Loop: the static mixer’s internal elements create multiple pressure drops, so when you stop squeezing, the column of adhesive in the cartridge and dispensing nozzle keeps pushing material out until that residual pressure bleeds off. A drip or tail after the cycle ends is the mixer relaxing, not a broken gun.
The engineered fix is an anti-drip release, and it has decades of patents behind it. US patent US4461407A describes an “automatic pressure release mechanism for caulk gun” that acts on both spring-grip and ratchet-driven guns the moment you release; later designs (US20070017935A1) add a selectable no-drip mechanism built from a cam lever, switch dog, and leaf spring. On a manual gun without that feature, you create the release yourself: after the last bead, hit the release tab and loosen the rod by drawing it back about a quarter inch. On pneumatic systems, a brief “suck-back” between cycles does the same job.
💡 Pro Tip
If the gun drips with the rod pulled back, the cartridge is over-pressurized. The cause is a mixer with too many elements or a partly blocked dispensing nozzle tip building back-pressure. Lower the compressed air setting rather than fighting the symptom at the tip.
Problem 5: Excessive Trigger Force, Ratchet Slip, or a Jammed Plunger
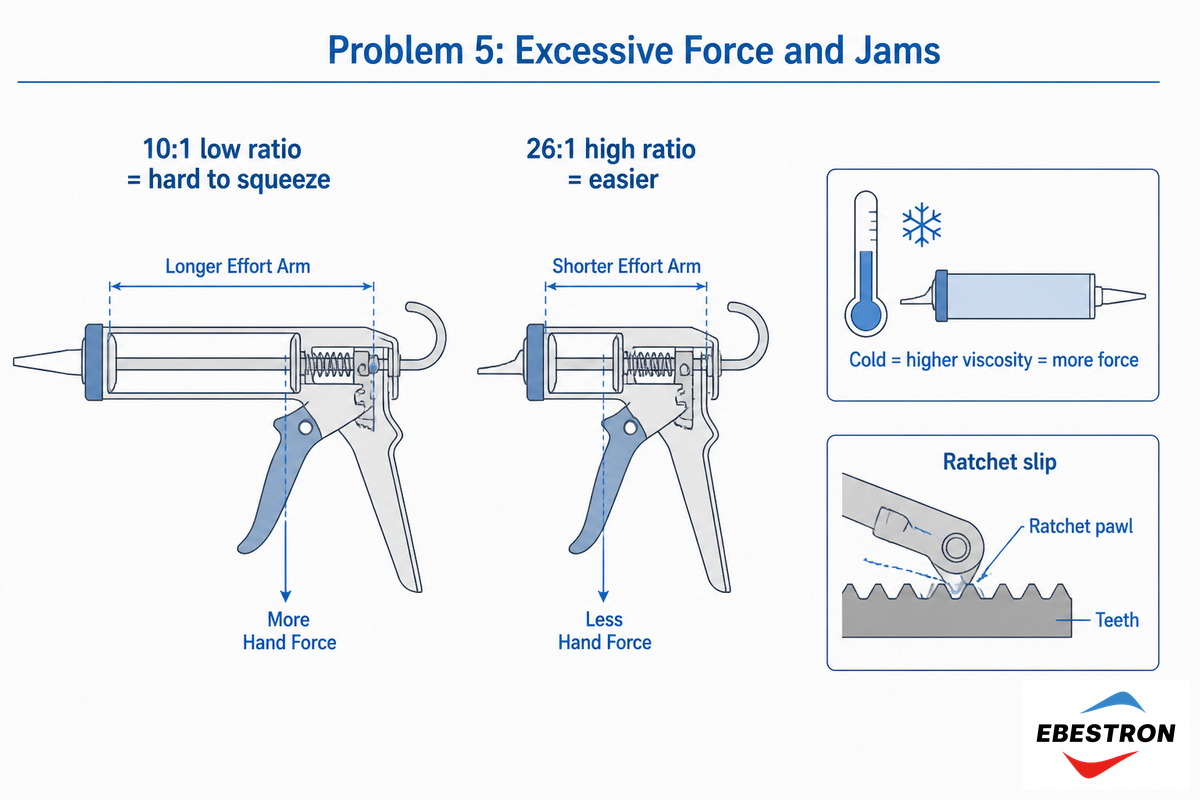
When a gun is brutally difficult to squeeze with a fresh cartridge, it’s seldom defective-more often the thrust ratio for the adhesive is undersized, or the cartridge is cold. That’s the Cold-Cartridge Force Penalty: Adhesive viscosity can skyrocket with dropping temperature, making the same 2K epoxy require multiple times the push of a hot bead in a chilly shop. Permabond’s own guidance is blunt: store epoxy in a cold environment and “some high-viscosity grades may become virtually impossible to dispense from a cartridge.” Independent rheology tests bear this out — an epoxy resin’s viscosity has a strong, well-documented temperature dependence, so warmer means less viscous. In a cold cartridge that viscosity multiplies, and so does the adhesive’s viscosity-driven friction on the pistons and rod — which is the extra squeeze your hand feels.
Why is the gun extremely hard to pull even with a new cartridge?
Two causes stack, and neither is a broken gun. The adhesive is cold — viscosity climbs as temperature drops, so a cold cartridge needs far more force than at room temperature (warm it to 20–25 °C). And the thrust ratio is too low. OSHA ergonomics favor squeeze levers; NIOSH adds that tool fit and posture matter. Match ratio to viscosity, warm the cartridge, and avoid forcing a regular caulking gun on heavy sealant.
How do I release a jammed manual cartridge gun?
With the gun cocked part way, press the ratchet release and draw the push rods fully back, then slide the cartridge out. If the plunger is sealed in because cured material has bonded it, rock the cartridge gently free, then inspect the rods and ratchet teeth for crud or burrs before reloading. A gun that keeps re-jamming with a clean cartridge has worn drive parts and should be retired.
Prevention: Cleaning, Lubrication, and a Pre-Shift Inspection Routine
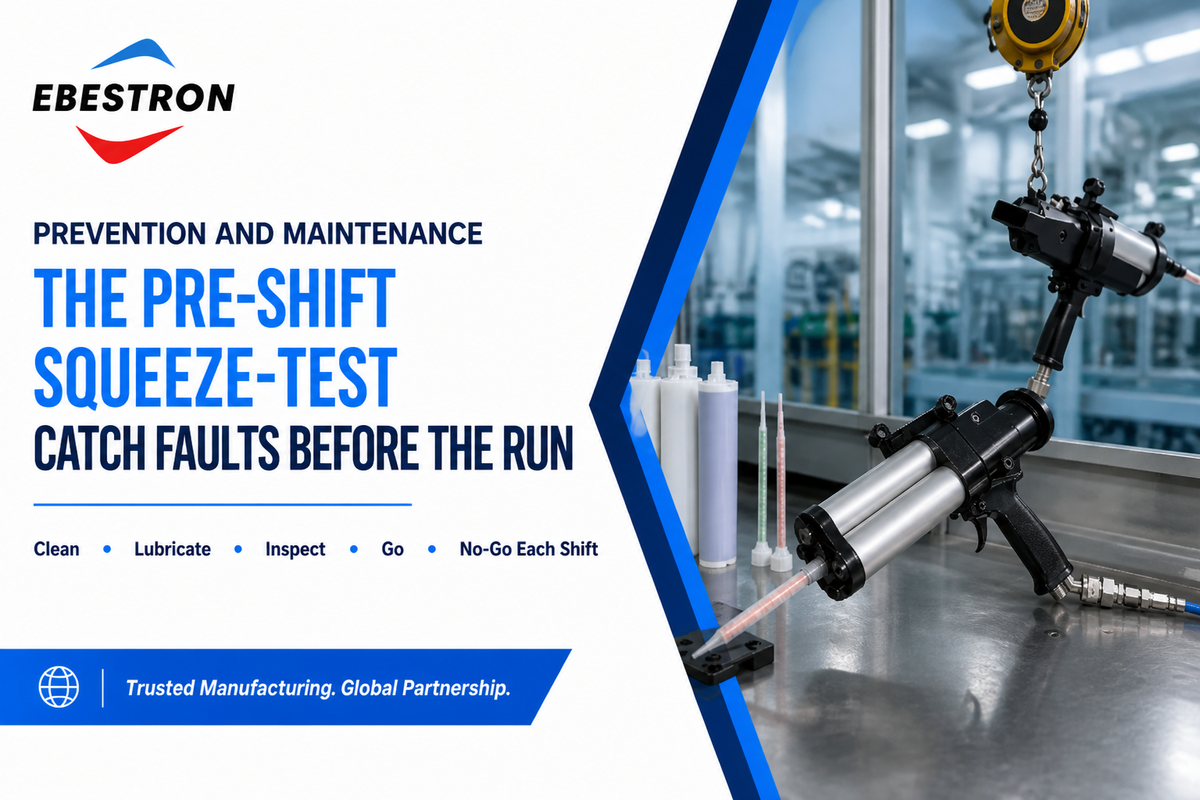
These five problems mostly require only minor attention as routine shop practices. The cheapest insurance against the latter two problems is pre-application testing; here’s an easy pre-run diagnostic sequence for just about any 2-part epoxy gun. The go/no-go test should be conducted every shift and any abnormalities should be logged and addressed.
Squeeze-Test Diagnostic Sequence (pre-shift)
- Squeeze once, does the plunger rod advance smoothly?
- Press the trigger – how much pressure is required? Test for roughly 25 to 50 percent higher than you experienced in the last good run with identical adhesive; if much higher see problems above.
- Hold pressure, does the ratchet hold without slipping?
- Watch the tip – does the cleanly mixed bead start at the beginning of a purge inch?
- Release the trigger and confirm the stream stops abruptly without oozing; then inspect the rods, pawl, and ratchet, and check follower-plate and push-rod alignment for residue build-up.
Between jobs, wipe the cartridge interface and tip threads with the cleaner or solvent to clear residue, apply a light lubricant to the rod and ratchet, and periodically disassemble the front end to inspect for hardened buildup. Check the air hose and any PTFE coating on the tip, and rotate stock first-in, first-out so cartridges never over-age. A few minutes of cleanup with the right tools extends gun service life, saves time on the next job, and keeps unplanned downtime off the line — whether you run a manual dispensing setup or a pneumatic one.
⚠️ Safety note on shop air
The 80–100 psi figure is the regulated air supply for dispensing on a pneumatic gun. If you ever use compressed air to blow out a cartridge interface or tip, that is a cleaning task — OSHA 1910.242(b) restricts compressed air used for cleaning to under 30 psi with chip guarding and eye protection. A 5-micron filter/regulator keeps oil and water out of the gun. Never point full 80–100 psi shop pressure at a clogged nozzle.
Repair or Replace? A Cost-Per-Shot Decision
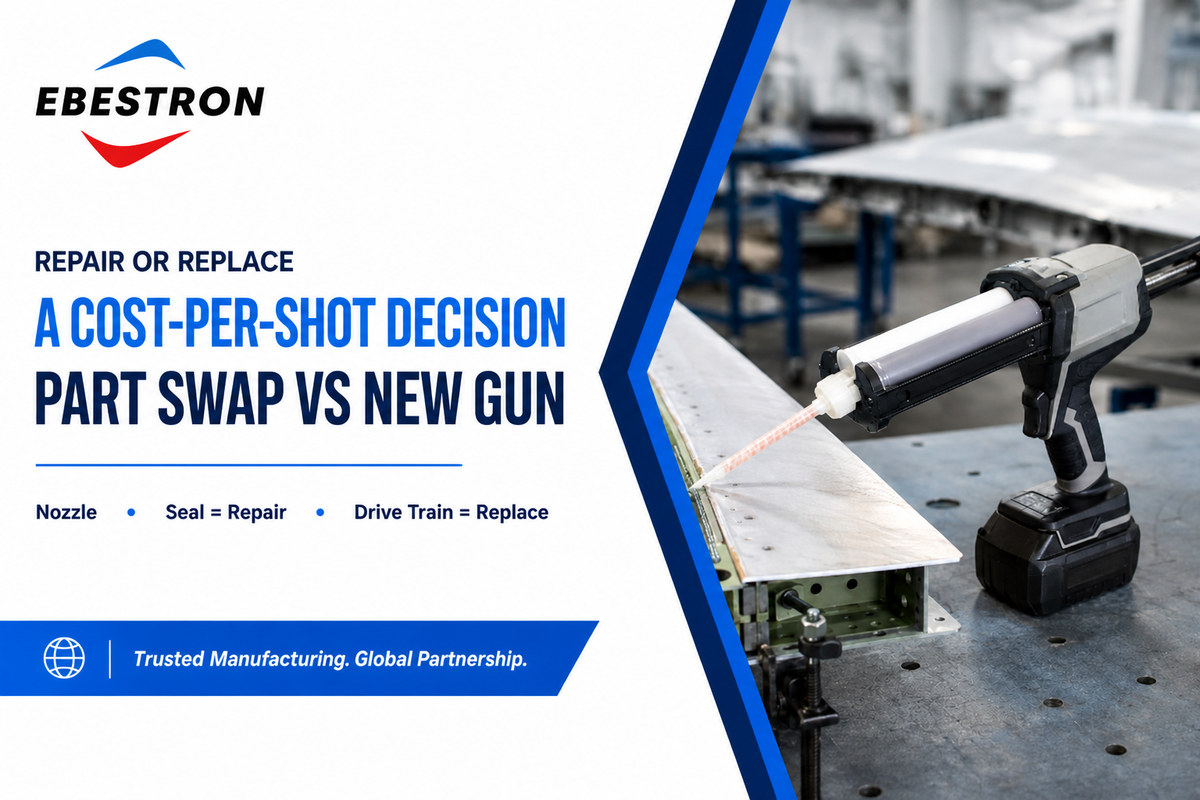
However, not all the gun faults necessitate a new gun. Here the determination should simply be separating consumables and seals that are inexpensive and quick fixes versus drive train issues which necessitate gun replacement. Use the chart below to decide at the bench or on the line as faults occur.
| Fault | Action | Why |
|---|---|---|
| Cured mixer / clogged tip | Replace nozzle | Consumable; cents per shot |
| Worn plunger / follower seal | Replace seal or cartridge | Serviceable wear part |
| Anti-drip not engaging | Repair / clean release | Mechanism, not structure |
| Stripped ratchet teeth | Replace gun | Drive train integrity lost |
| Bent push rods | Replace gun | Will keep slipping/jamming |
| Cracked frame | Replace gun | Unsafe under thrust load |
When possible, use the following practical rule. If the malfunctioning component is a nozzle, a seal or a cartridge, replace or rebuild. If it’s in the gun drivetrain, (ratchet assembly,rods or frame,) a new gun is in order, since a “slipping under load” hand-operated gun wastes material and creates an operator-injury risk. When a manual gun on heavy mix applications consistently fails, it’s usually the more economical and practical decision to move up to a higher-thrust manual gun or pneumatic alternative rather than undertaking further repair work.
Industry Outlook: Why Recurring Faults Push Shops Toward Semi-Automated Dispensing
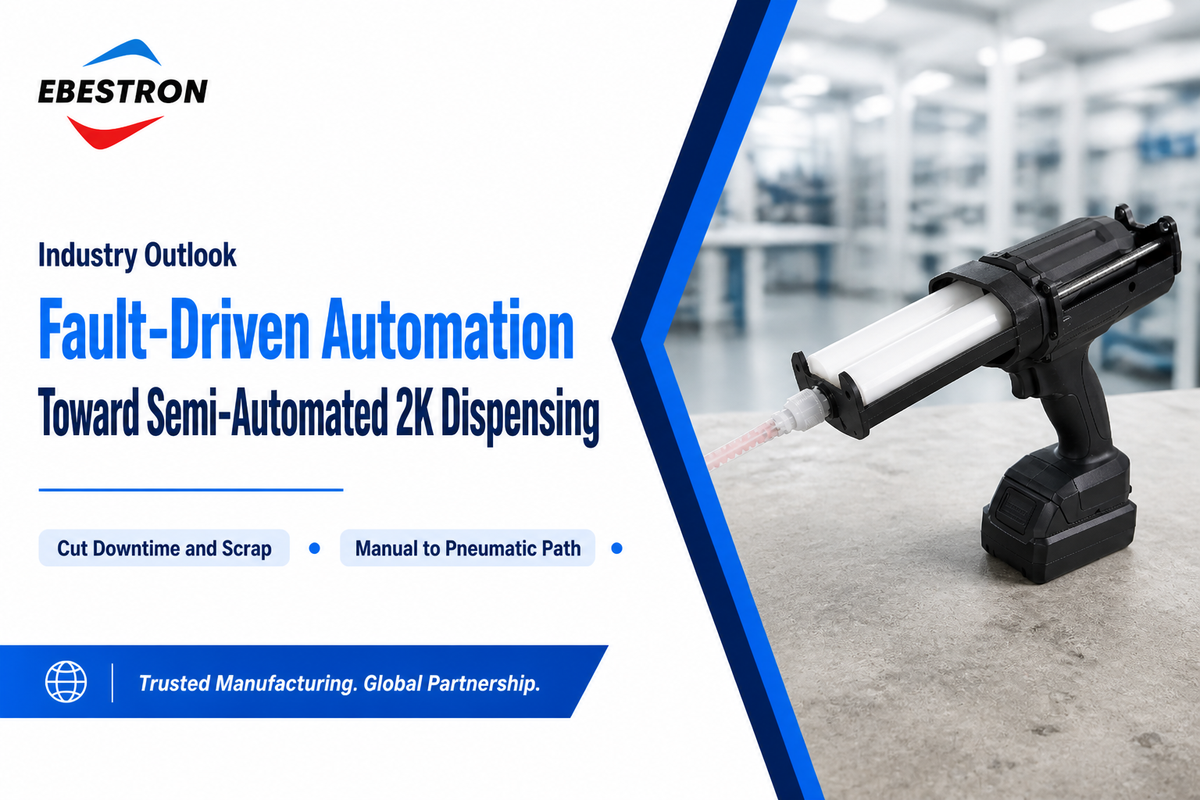
In reality, the combination of problems outlined here are why high-volume 2K producers are transitioning from manual guns, not merely a market trend. Each component issue, be it run-on, fatigue, or inaccurate mix ratios can lead directly to scrap and process downtime, making a semi-automatic or fully robotic dispensing solution cost-effective over time. The market indicates this transition is underway, with fluid/adhesive dispensing robots out pacing the growth of general dispensing equipment by a considerable margin( ~11% CAGR vs. ~4.85% CAGR for the overall segment through 2031) as automation removes the human-variable problems of handguns. While that shift is underway, it isn’t a ubiquitous move; robotics adoption has even contracted in some industrial regions and smaller businesses often struggle with available technical skills and capital investment. The most likely step for the majority of manufacturers in the near future involve the implementation of a more appropriate manual or pneumatic gun, paired with strict maintenance procedures and troubleshooting protocols, until unavoidable costs justify a more substantial investment in automation.
Two concrete signals for buyers in 2026. 1. Error-proofing is going upstream. Starting Jan 2026, an industry trade report states that “machine-vision and AI systems” are now identifying bead-defects at dispensing, i.e., the drip and over-bead/under-bead defects that you fix on an ad-hoc basis at a manual gun. For example, one vendor reports replacing a felt applicator with a dispense valve reduced primer usage by 50% and eliminated “the ‘clogging’ of the valve head, which led to frequent equipment maintenance delays.” 2. The test data are up-to-date. 2024 edition of ISO 10364 should now be reflected on datasheets from vendors-the pot-life and working-life values on modern datasheets are relevant now. Bottom line: For anyonedispensing more than a handful of cartridges/shift: track every failure at the “five key” cartridge-failure points discussed and as soon as you exceed your scrap threshold from a manual gun “slowdown”, consider the ROI of moving to a controlled-air or a fully automated system before signing your next cartridge contract and retain the troubleshooting skills in-house.
Frequently Asked Questions
Q: Why isn’t anything coming out of my dispensing gun even when I squeeze the trigger?
View Answer
Check four things in order. First, the retainer cap is off and the inner foil seal is pierced so the follower plate rides the cartridge piston, not the sidewall. Second, the ratchet is engaged, not set to release. Third, the nozzle is clear. Remove the nozzle and dispense straight from the cartridge: if a stream appears, the mixer is clogged; if not, the fault is in the cartridge or the drive assembly, so inspect the rods and seating.
Q: How do I unclog a cured static mixing nozzle?
View Answer
You do not — you replace it. Once two-component adhesive cures inside the 18–24 mixer elements, the channels are blocked permanently, and forcing or drilling risks bursting the cartridge fitting. Solvent only clears uncured residue at the tip and threads, never a gelled mixer; keep a spare mixer within easy reach.
Q: Why does my dispensing gun keep dripping after I release the trigger?
View Answer
Post-release drip is stored residual pressure in the cartridge and 18–24-element mixer relaxing, not a seal leak. An anti-drip gun bleeds it off instantly; on a manual gun, hit the release tab and draw the rod back a quarter inch after each bead, or lower the air toward 80 psi.
Q: Why is the gun so hard to squeeze with a brand-new cartridge?
View Answer
Two causes stack, and neither means a faulty gun. First, the adhesive is cold: viscosity rises as temperature falls, so a cartridge in a cold shop can need 3× the pressure of the same adhesive at room temperature (20–25 °C) — pre-warm it. Second, the thrust ratio is too low: a viscous 2K epoxy that feels like rock in a 10:1 gun is easy in a 26:1 gun. Match ratio to viscosity, or move to a pneumatic gun.
Q: How do I reset or release a jammed manual cartridge gun?
View Answer
Press the ratchet release tab, draw both push rods fully back, and slide the cartridge out. Before refitting, inspect the teeth and rods for wear or burrs; a gun that keeps jamming on a clean cartridge has worn drive parts.
Q: When should I replace the whole dispensing gun instead of a part?
View Answer
Replace consumables and seals — nozzles, plunger seals, gaskets, cartridges — as routine wear items. Replace the whole gun when the damage is in the drive train: stripped ratchet teeth, bent push rods, or a cracked frame. Those faults make the gun slip under load, waste adhesive, and rarely survive a rebuild. If a manual gun keeps failing on high-viscosity adhesive, the most cost-effective fix is usually a higher-thrust or pneumatic model matched to the job.
References & Sources
- Ergonomic Solutions, Hands and Wrists (trigger levers)U.S. OSHA
- The Ergonomic Use of Hand Tools: Guidelines for the PractitionerCDC / NIOSH
- Temperature dependence of epoxy resin viscosityPMC, U.S. National Library of Medicine (NIH)
- ISO 10364:2024, Structural adhesives, Determination of the pot life of multi-component adhesivesInternational Organization for Standardization
- US4461407A, Automatic pressure release mechanism for caulk gunUSPTO
- US20070017935A1, Caulking gun (no-drip mechanism)USPTO
- US4081112A, Caulking gun (trigger-lever geometry)USPTO
- 29 CFR 1910.242(b), Compressed air used for cleaningU.S. OSHA
- Troubleshooting the Dispensing ProcessASSEMBLY Magazine
- Revolutionized: AI and machine vision in dispensing (January 2026)Adhesives & Sealants Industry
Related Articles
- How to Choose a Two-Component Adhesive Dispensing Gunmatch thrust ratio and drive type to your adhesive
- Epoxy Gun Buyer Guide: Manual, Pneumatic, and Batterydrive-type duty cycles compared
- Caulking Gun vs Two-Component Cartridge Dispensing Gunwhy a 2K gun isn’t a caulk gun
- Static mixing nozzle selection for clean 2K mixing
The Team Behind This Guide
Ebestron produces two-component dual cartridges, static mixing nozzles, and the manual and pneumatic dispensing guns these faults occur on, supplying 2K adhesive packaging consumables compatible with Sulzer Mixpac, Nordson, and 3M systems. This guide reviews the thrust ratio, follower plate, and mixer issues our technical team sees most often across cartridge formats. Reviewed by the Ebestron technical team.
Find the Right 2K Dispensing Gun →
Still unsure what thrust ratio your adhesive requires? Book a 15-minute call with our team.