Get in touch with Ebestron Company


Updated June 2026 · Reviewed by the Ebestron technical team
A two-part adhesive cartridge separates resin from hardener and meters them at a constant ratio through a static mixing nozzle. Learning how to use a two-part adhesive cartridge properly makes the difference between a smooth, fully cured bond and a wasted dollop of adhesive on a joint that never strengthens. This guide carries the job from start to finish, loading, equalizing, purging, mixing, dispensing, curing, troubleshooting, and storing, with the mix ratios, volumes, and timing data you need at the bench.
In a nutshell: load the two-part adhesive cartridge into a matching dispensing gun, advance the plunger until both pistons bead evenly, slide a static mixing nozzle onto the tip, purge about one nozzle’s worth of the off-ratio first bead (see below), then dispense the on-ratio, well-mixed adhesive onto a clean, prepared surface within the work life.
Quick Specs: Two-Part Cartridge at a Glance
| Common volumes | 50, 200, 400, 600 ml (up to 1500 ml bulk) |
| Mix ratios | 1:1, 2:1, 4:1, 10:1 (by volume) |
| Formats | Side-by-side (B / C-System) and coaxial |
| You need | Cartridge + matched dispensing gun + static mixing nozzle |
| Rule of thumb | Purge ~1 nozzle length first; work life roughly halves per +10°C |
What a Two-Part Adhesive Cartridge Is (and Why Two Chambers)
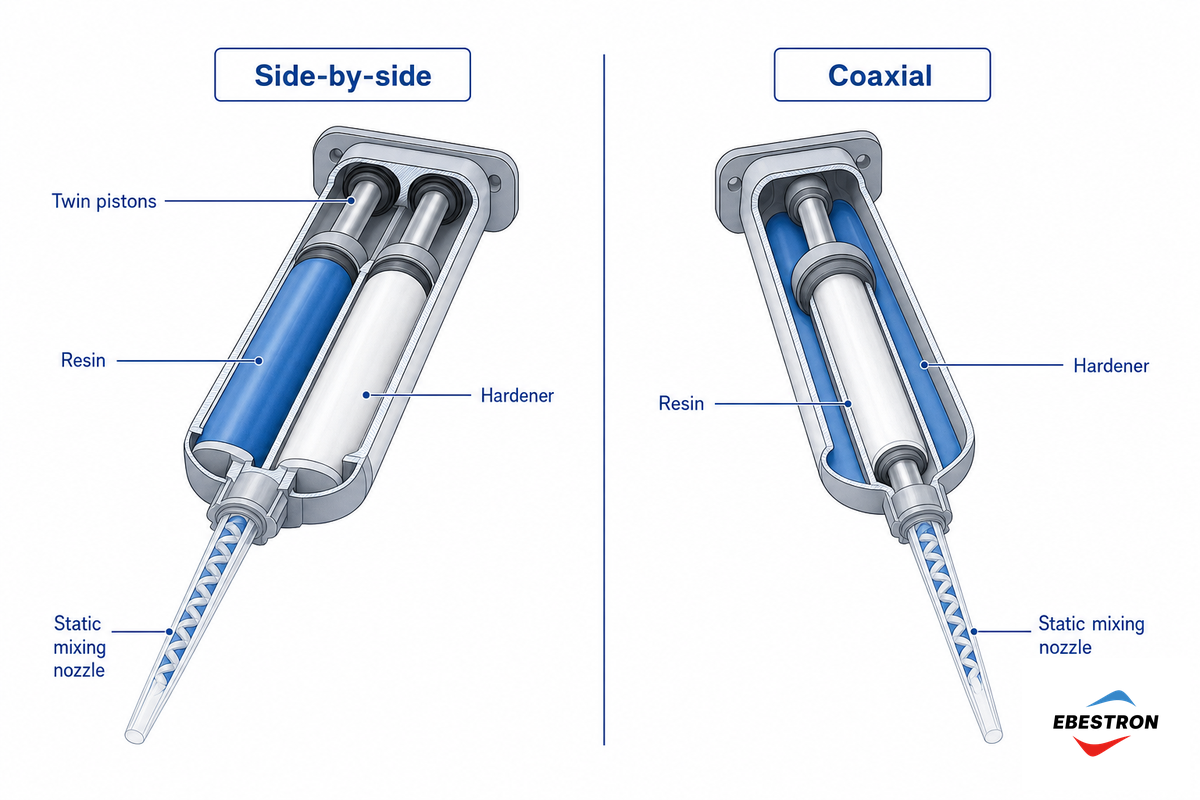
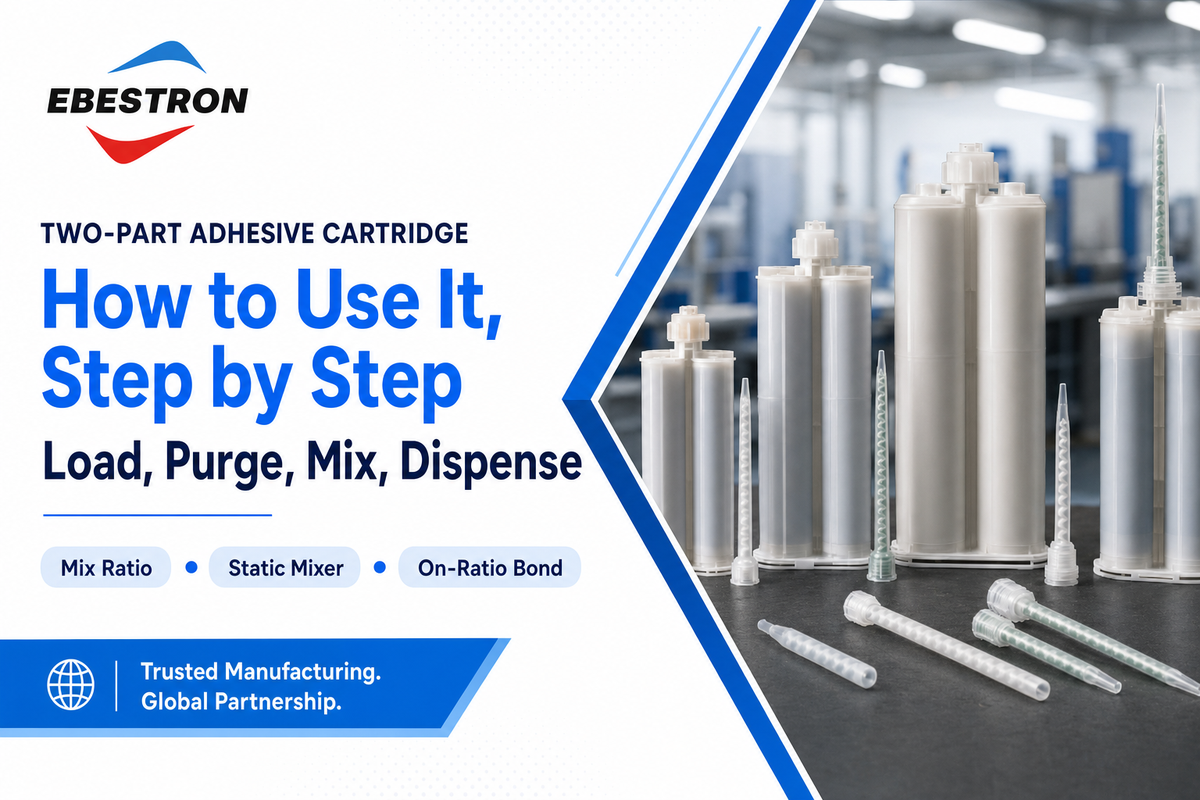
A two-part adhesive cartridge is a dual-chamber plastic package, with separate barrels for a resin and a hardener, so the two can’t combine until you dispense them. Unlike single-part glues, which set by drying or by reacting with ambient moisture in the air, a two-component adhesive cures by chemical reaction the moment the materials meet, pass through the mixer, and leave the nozzle tip. The package is therefore as critical as the chemistry: the cartridge meters a fixed ratio, and a static mixer homogenizes the two streams into an on-ratio product.
There are two main formats. In side-by-side cartridges, two barrels lie next to each other (the Sulzer Mixpac B and C-System families); in the coaxial design, one barrel nests inside the other. The chamber dimensions define the mix ratio, a 10:1 cartridge simply gives the resin barrel ten times the cross-section of the hardener barrel, an arrangement that go back to early dual-chamber dispensing patents such as US Patent 3,286,992, which paired a two-component cartridge with a static mixer in the nozzle. The major adhesive types, two-component epoxy adhesives, polyurethane and urethane adhesives, and acrylics, all use a version of the same principle.
How Do Two-Component Adhesives Work?
Two-component adhesives are built from two parts, a resin and a hardener, that are themselves reactive chemistries and combine only at the right ratio to form a cross-linked polymer solid. The hardener isn’t a drying agent; it’s a specific reactant that combines in exact chemical stoichiometry, so the proportions are fixed by chemistry, not preference. Mixing the two set off an exothermic reaction that links molecules into a strong, high strength, chemically resistant structural bond that a one-part glue, which relies on air to dry, can’t achieve. Cured on a correctly prepared substrate, the adhesion is dependable across many different substrates.
At Ebestron we manufacture the dual cartridges along with the static mixers, dispensing guns, and tips used to apply two-component adhesives, see our two-part adhesive cartridges for the formats below.
What You Need: Cartridge, Dispensing Gun, and Static Mixing Nozzle
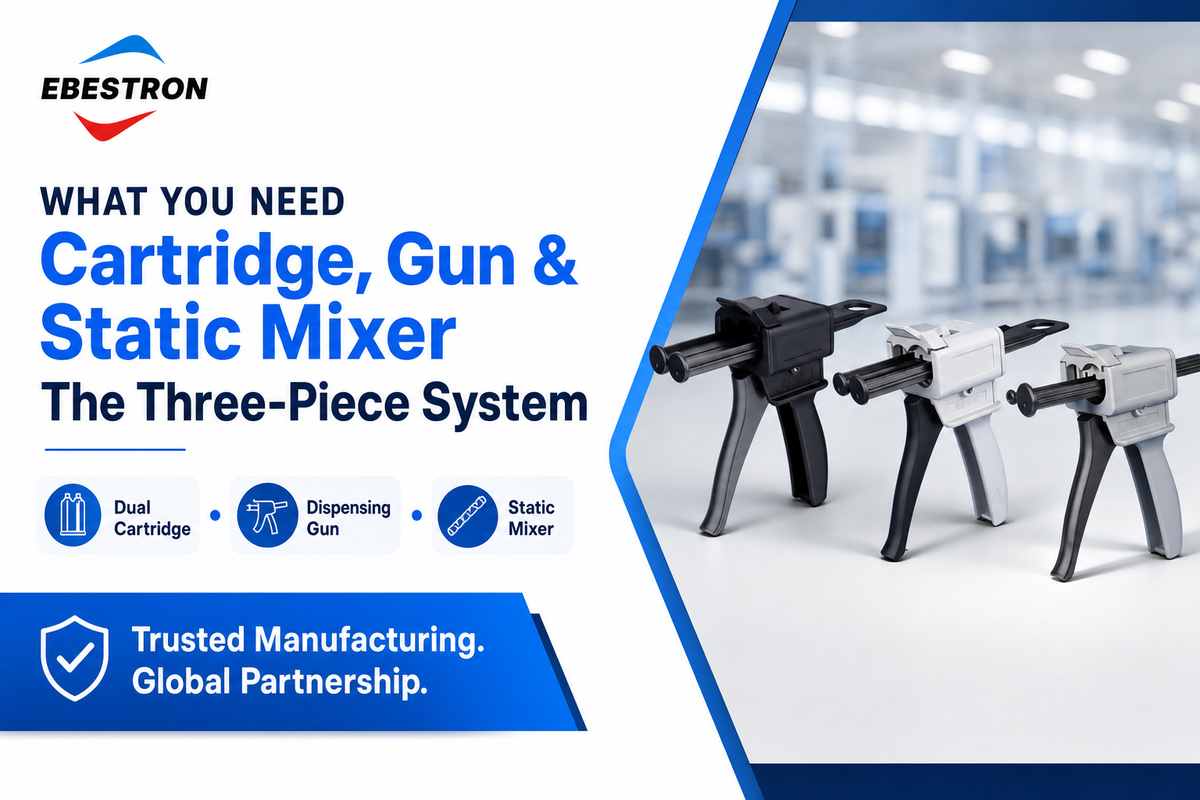
The system has three parts: the cartridge, a dispensing gun that pushes both plungers together, and a static mixing nozzle that blends the streams. When applying two-part adhesive, the cartridge alone does nothing: you rely on the gun applicator to apply the bead, which supplies the push, and the mixer perform the mixing that would otherwise be done by hand mixing, sparing the time to mix and the measuring error of manual adhesive blending. On high-volume lines, an automated adhesive dispenser takes over the same mixing and dispensing work, letting operators mix and apply faster while holding a steady adhesive flow. As application engineer Tom Buckley writes in Adhesives & Sealants Industry, assemblers must check plunger depth to confirm the correct mix ratio before they ever pull the trigger.
“Before application, assemblers must check plunger depth to ensure the correct mix ratio. Cartridges also require some type of dispenser, whether it be a handheld gun or a semiautomatic unit.”
Guns come in three drive types: a manual cartridge gun for low-volume work, a pneumatic cartridge gun that delivers consistent dispensing and a clean application on stiff, difficult to dispense grades by using compressed air to pressurize the cartridge, and a battery-electric cartridge gun for repetitive beads. The mixer threads or bayonets onto the cartridge outlet; we cover choosing the right one in our guide to static mixing nozzle types.
📐 Engineering Note
Match the gun thrust ratio to the cartridge mix ratio. A 10:1 cartridge needs a 10:1 gun so the two plungers advance proportionally; run a 10:1 cartridge in a 1:1 gun and the small hardener piston either stalls or overfeeds, throwing the output off ratio. For more, see our guide to how to choose a 2K dispensing gun.
The 7-Step Cartridge Dispensing Walkthrough
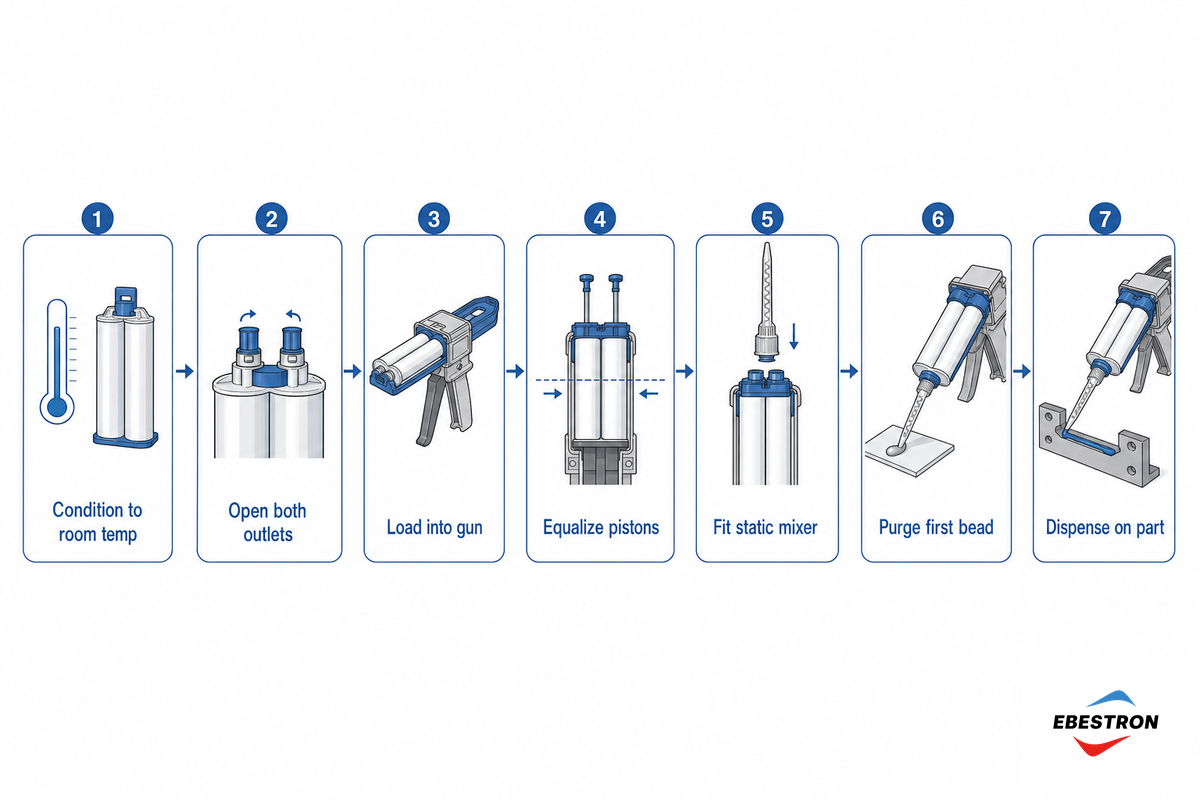
This 7-step Cartridge Dispensing Walkthrough guides you from a cold cartridge to a bonded part in a fixed order, disrupt the sequence and your bond pays for it. Follow this step-by-step procedure the same way every time and the result is consistent.
- Condition the cartridge. Bring it to room temperature (about 20–25°C) and check the date code. Cold resin is thick and hard to push; a warm shop speeds the cure.
- Open both outlets. Remove the cap (and any foil seal) so both dispensing ports are open. Note which stopper prong sits in which barrel so you can recap correctly later.
- Load and seat the plunger. Place the cartridge in a matched gun and advance the rods until the plunger ends touch the piston heads.
- Equalize the pistons. With no mixer attached, dispense a little until resin and hardener bead out evenly. A new cartridge often has slightly unequal piston heights, so the first material is resin- or hardener-rich.
- Fit the static mixer. Thread or bayonet it onto the equalized outlets.
- Purge the first bead. Dispense the First-Bead Purge Window (below) onto scrap before the joint.
- Dispense onto the part. Apply a steady, continuous bead along the surface, staying within the adhesive’s work life.
The First-Bead Purge Window
The First-Bead Purge Window is the slug of adhesive you discard before bonding, about one full nozzle length, or two to three times the mixer’s internal volume (a 5–8 cm bead on a 50 ml cartridge). You lose it for a mechanical reason: the material that leave the mixer first hasn’t passed through enough mixing elements to reach the correct ratio, so it comes out off ratio and never fully cures. Don’t rush the purge; as practitioners note on Eng-Tips, a hurried purge only traps air. Keep the flow steady until the bead run uniform and streak-free, on a two-tone adhesive, even color is your on-ratio signal.
Scenario: A technician bonding an aluminum bracket grabs a fresh 50 ml cartridge, clicks on a new mixer, and lays the first bead straight onto the part to save adhesive. The bond line stays tacky for days and peels off under light load. The fix was upstream and free: equalize the pistons, then purge the first 6 cm onto a paper towel. The wasted inch of adhesive costs a few cents; the failed bond cost the part.
Getting the Mix Ratio Right: 1:1, 2:1, 4:1 and 10:1
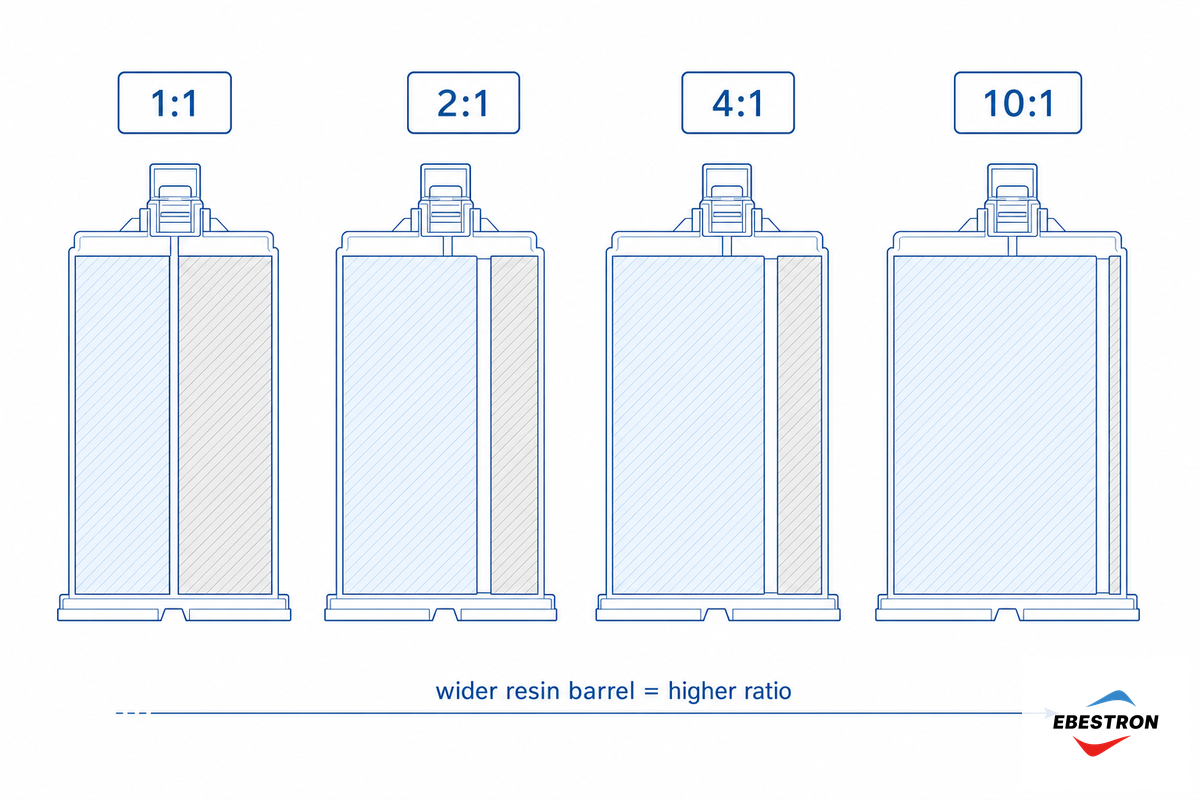
The mix ratio is set by the cartridge and enforced by a matched mixer, there’s no freehand measuring. The ratio matter because the cure is stoichiometric: a peer-reviewed study in PubMed Central found that inaccuracy in the hardener-to-resin ratio measurably degrades joint strength. An off-ratio mix leave uncrosslinked resin or hardener in the bond line, so the joint stays soft, weak, or permanently uncured. A proper mix in a two-part epoxy adhesive cures to rated strength; an incorrect mix never does. Wide ratios such as 10:1 are easier to starve than closer ratios like 2:1, which is why closer ratios generally process more easily.
📐 Engineering Note
You can’t fix an off-ratio joint after dispensing by adding more of one component, that only leave unreacted resin or hardener and a soft, weak bond. If the ratio is off, scrap the bead, find the cause (pistons out of phase, a starved 10:1 barrel, or a skipped purge), and re-dispense.
Working Time, Open Time, and Cure: The Cure Timeline
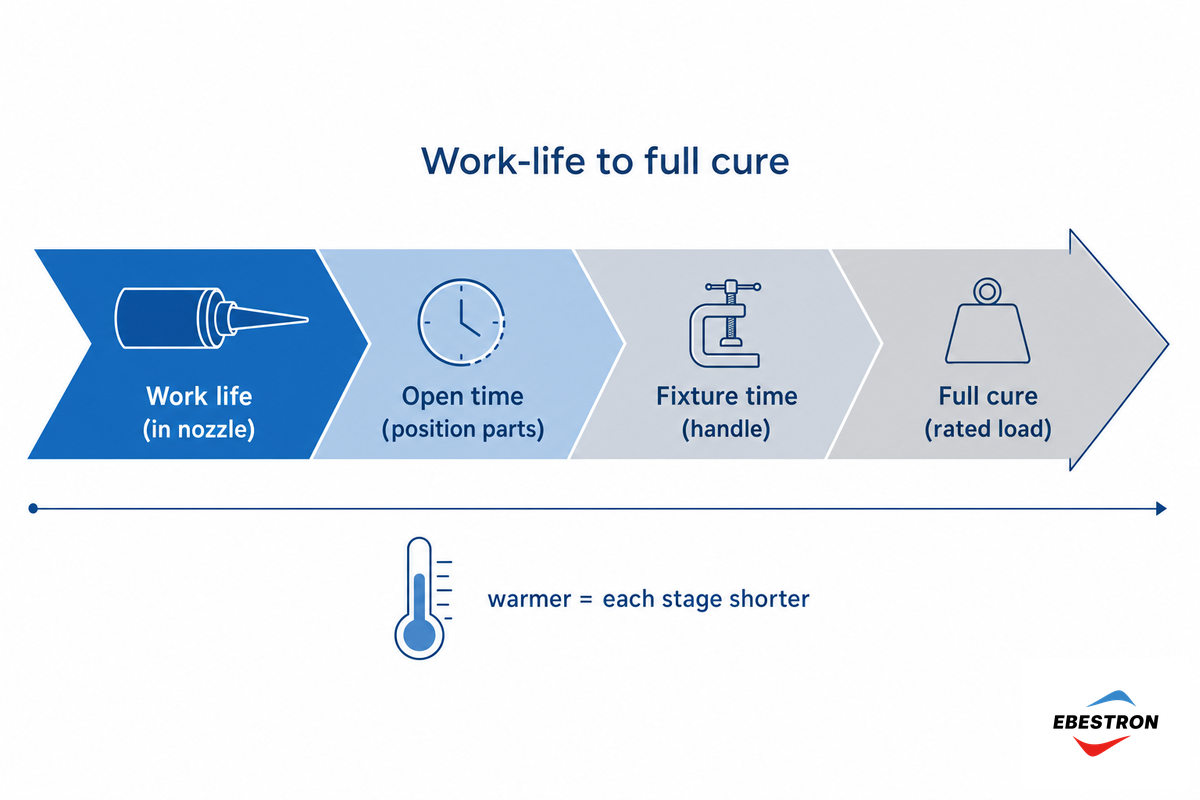
Four distinct stages govern a mixed two-part adhesive, and the Work-Life-to-Full-Cure Timeline names them in order: work life or pot life (how long the material stays fluid in the nozzle), open time (how long you can position parts after applying), fixture time (when the joint can be handled), and full cure (when it reaches rated load). Each stage grows shorter as temperature rises. As a rule of thumb, cure time roughly halves for every 10°C rise, so a 10 min work life at 23°C may drop to about 5 min at 31°C, where the adhesive starts to gel inside the mixer.
How Long Does Two-Part Epoxy Take to Cure?
Most two-part epoxies are tack-free and ready for handling in roughly 5 to 90 min, reach fixture strength in about 30 min to 2 hours, and reach full cure in 24 hours to 7 days, depending on the formulation and temperature. The two parts begin reacting within 1 to 3 min of passing through the mixer, as resin-casting practitioners report, which is why you plan the joint before you purge. Warming the part accelerates cure but spends work life faster; at elevated temperatures the two part epoxy can gel in the nozzle before you finish, while cooling extends work life but slows fixture time. Confirm the exact numbers on the adhesive’s datasheet, not the cartridge.
Scenario: A line in an un-air-conditioned plant dispensed a 5 min work-life acrylic at 23°C for months with no trouble. Then in July the bay hit 33°C, work life dropped toward 2 min, and operators started finding mixers cured solid mid-shot. Nothing was wrong with the adhesive, the Cure Timeline had simply compressed with the heat. Switching to smaller purge batches and a longer-pot-life grade restored throughput.
Troubleshooting: The 2K Cartridge Failure-Mode Atlas
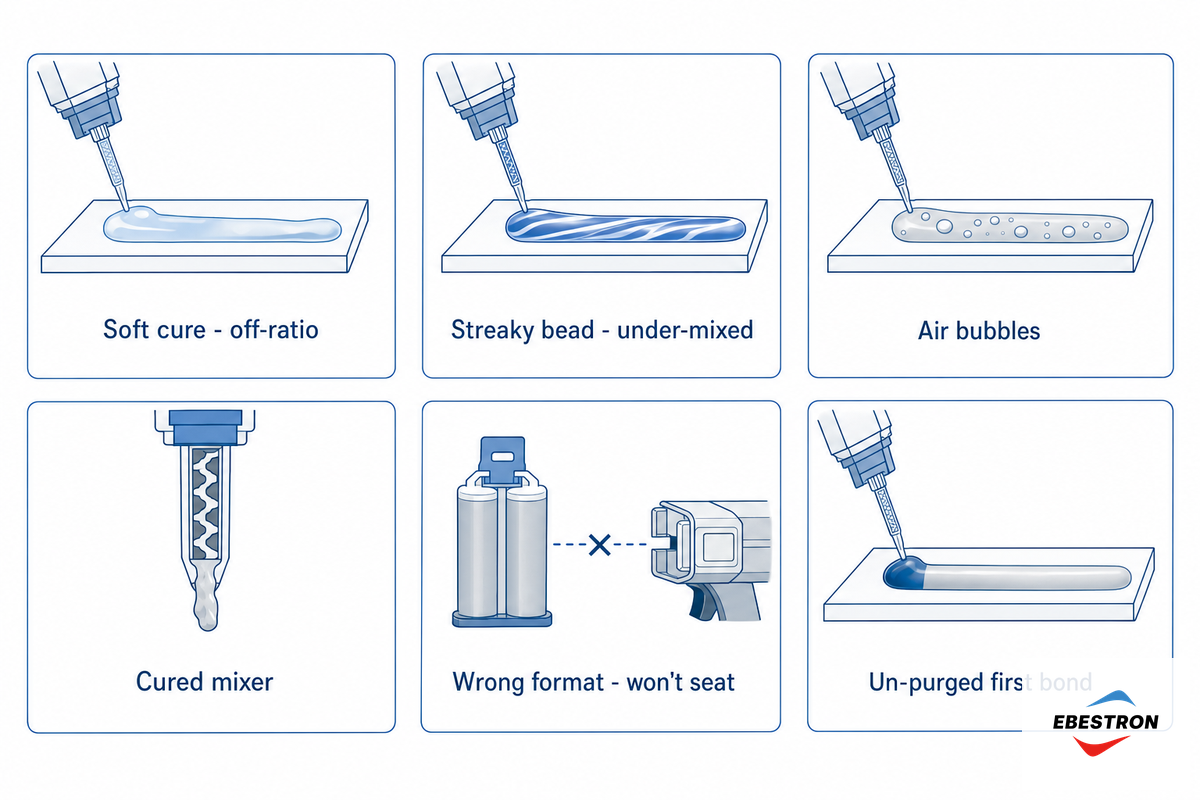
Most dispensing failures trace to a usage or hardware cause, an un-purged bead, unequal piston advance, a cured mixer, or a cold cartridge, rather than to the adhesive itself. The standard reference for describing how a bonded assembly fails is ISO 10365:2022, which designates the main failure patterns of bonded assemblies. Use the 2K Cartridge Failure-Mode Atlas below to map a symptom to its cause and fix.
| Problem | What you see | Root cause | Fix |
|---|---|---|---|
| Soft / tacky cure | Bond stays rubbery for days | Off-ratio or under-mixed material | Equalize pistons, re-purge, use full-length mixer |
| Streaky two-tone bead | Visible color streaks | Mixer too short or skipped purge | Use correct element count, purge to even color |
| Air bubbles / voids | Foamy or pitted bead | Trigger pulsed too fast, air entrained | Slow, steady pressure; keep tip submerged in bead |
| Plunger won’t advance | Gun stalls, very hard to squeeze | Cold, high-viscosity resin | Warm cartridge to room temp; use a pneumatic gun |
| Mixer cured mid-job | Solid plug in the nozzle | Paused longer than the work life | Replace mixer, re-purge; work in smaller batches |
| Cartridge won’t seat | Doesn’t lock into the gun | Wrong format or ratio gun | Match B vs C-System / coaxial and ratio |
| Weak first bond | Only the first joint fails | Un-purged first bead bonded | Always purge before the joint |
| Blow-by / back leak | Adhesive leaks past rear piston | Cured tip blocks flow, pressure backs up | Clear or replace mixer; reduce thrust |
| Cloudy / crystallized resin | Grainy or hazy part A | Stored too cold | Gently warm, inspect, then dispense |
| Cures too fast in nozzle | Gels before you finish | High temp plus long mixer | Shorter mixer, smaller shots, cool storage |
| Uneven A:B flow | One barrel lags | Pistons not equalized | Re-equalize with mixer off before bonding |
Failure-mode framework compiled by the Ebestron technical team from field dispensing experience.
For a deeper, problem-by-problem reference, our dedicated guide to common 2K dispensing problems goes further than this in-line atlas.
Storage, Shelf Life, and Reusing the Cartridge
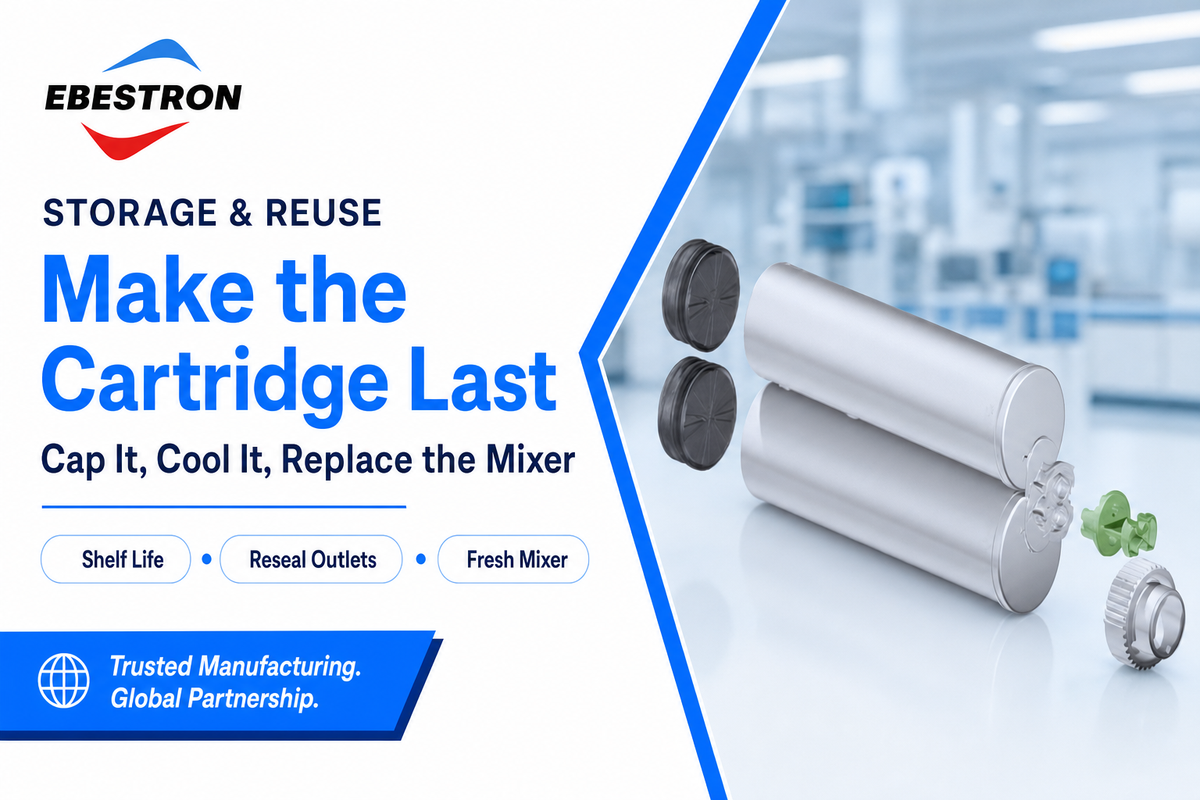
A partly used cartridge can be reused, but the static mixer can’t. After the last dispense, the material left in the nozzle reacts and cures; ASSEMBLY magazine notes that material left in a mixer too long cures on the perimeter and clogs it. The practical move is to leave the cured mixer threaded on as a temporary cap, then twist it off and fit a fresh one next session. If you prefer the original cap, match each stopper prong to the barrel it came from, or you’ll cross-contaminate the outlets and bond them shut.
Can You Reuse a Two-Part Adhesive Cartridge?
Yes, you can reuse a two-part adhesive cartridge if you seal the barrels promptly so the adhesive doesn’t cure in the outlets, and you store the cartridge cool, dry, and upright. Plan on a fresh static mixer for every session, re-equalize and re-purge before the next joint, and let a cold cartridge return to room temperature so the resin viscosity drop back to a workable level. Always read the date code, a purge bead that won’t cure evenly tells you the stock is spent.
💡 Pro Tip
Store cartridges nozzle-up. If a barrel weeps, you will see it before it contaminates the opposite chamber, and the pistons stay seated against the material instead of drawing air.
Safety, Surface Prep, and Cleanup
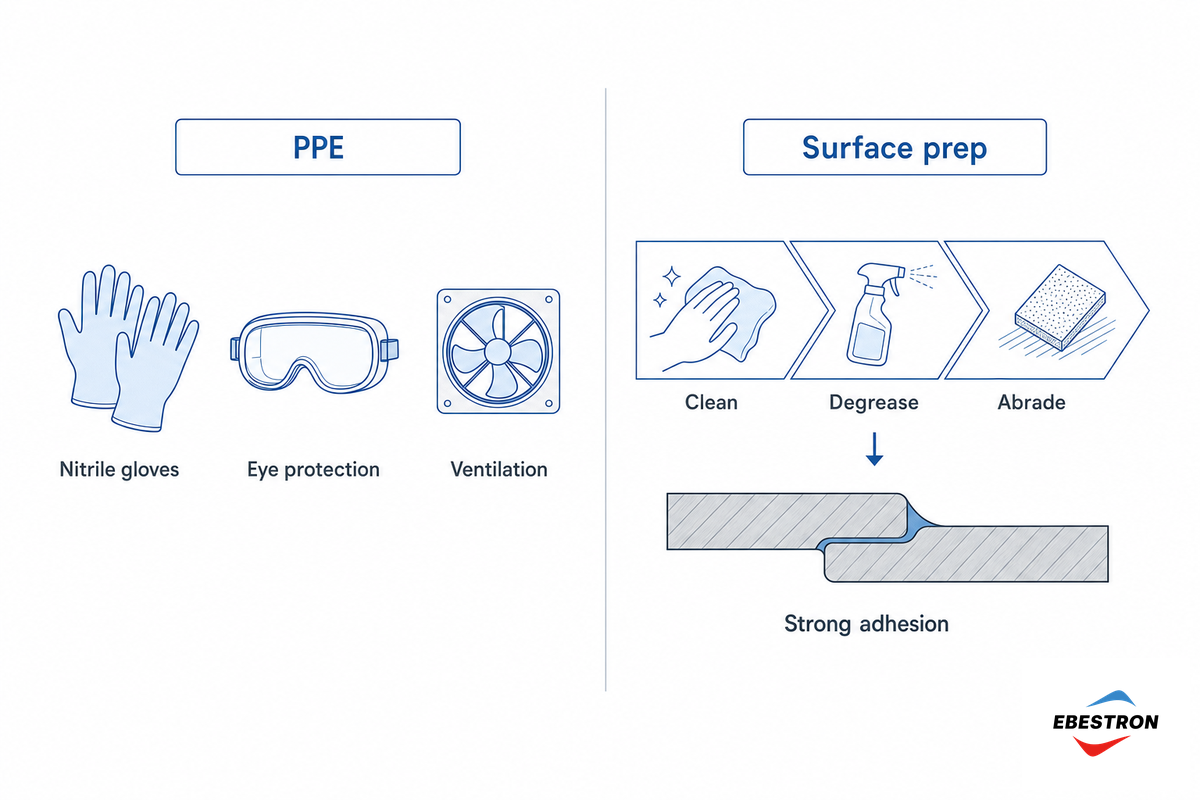
Two-component adhesives are reactive chemistries, so treat them accordingly. Two-part polyurethanes contain isocyanates, which the OSHA Technical Manual flags as the significant hazard in these resin systems, and the U.S. EPA documents that diisocyanate exposure can cause contact dermatitis, respiratory irritation, and sensitization. Epoxies are skin sensitizers too. Wear nitrile gloves and eye protection, work with adequate ventilation, and review the CDPH guidance on working safely with isocyanates for two-part polyurethane work.
Surface preparation is where adhesion is made or lost, before the bead lands. Clean, degrease, and abrade the surface so the adhesive keys into the substrate across the variety of substrates you bond. Wipe uncured material with the solvent named on the datasheet, and dispose of cured cartridges and mixers per local rules. For tight beads and small parts, fit precision dispensing tips after the mixer to place the adhesive exactly where the joint need it.
Cartridge Sizes and Brand Compatibility (50–600 ml; Mixpac / Nordson / 3M)
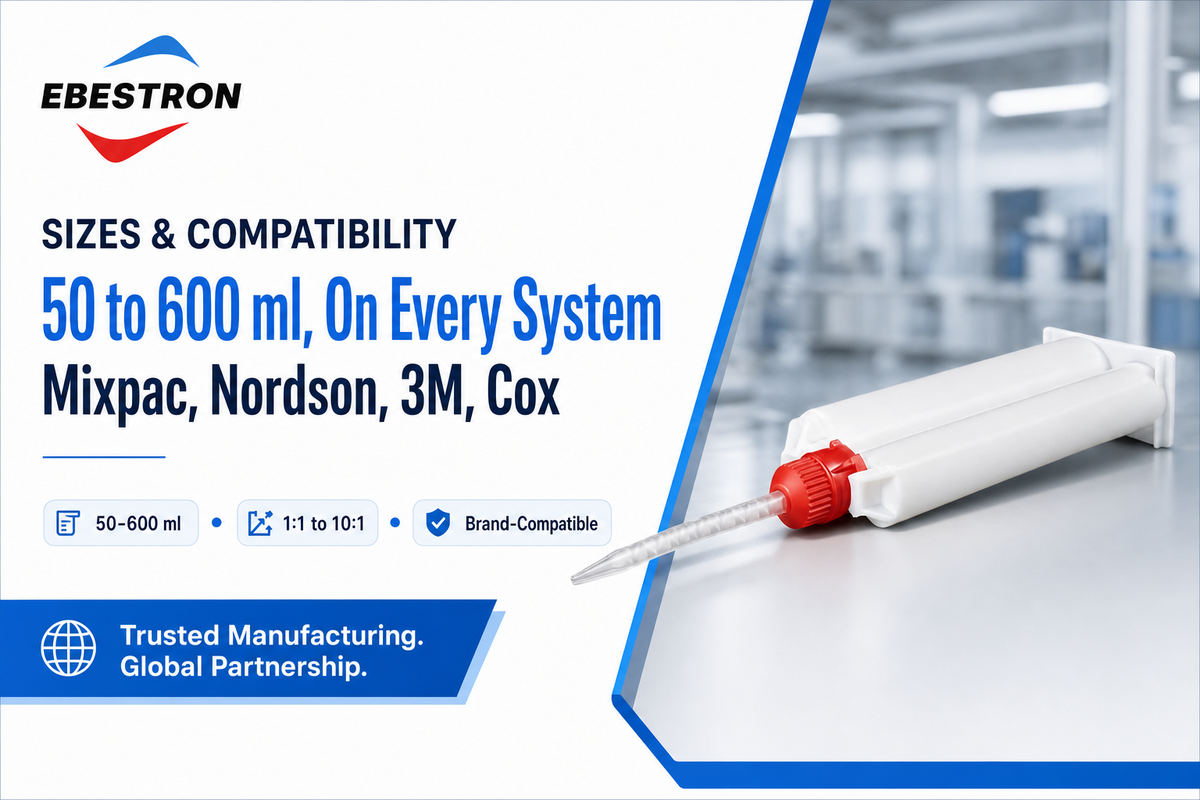
Cartridges run from 50 ml up to 1500 ml. According to Adhesives & Sealants Industry, premeasured side-by-side packages are typically 35 to 490 ml, while most assemblers reach for 200 or 400 ml for general work. The format you hold dictates the gun and mixer that fit it, so identify the volume, ratio, and system family before you buy consumables. A 600ml coaxial cartridge suits high-throughput industrial applications, where filler content, viscosity, and shot size drive the choice. The reference below maps the common formats to what they’re used for.
| Volume | Ratio | System type | Typical use |
|---|---|---|---|
| 50 ml | 1:1 | Side-by-side (Mixpac B) | Bench repair, prototyping |
| 50 ml | 2:1 | Side-by-side | Structural acrylics, electronics |
| 50 ml | 10:1 | Side-by-side | Low-hardener epoxies |
| 200 ml | 1:1 | C-System | General assembly bonding |
| 200 ml | 2:1 | C-System | Panel bonding |
| 400 ml | 1:1 | F-System | High-volume production |
| 400 ml | 2:1 | F-System | Composite and metal bonding |
| 400–600 ml | 4:1 | Side-by-side | Construction adhesives |
| 600 ml | 1:1 | Coaxial / sausage | Large-area, high-throughput |
| 1500 ml | 1:1 / 2:1 | Bulk coaxial | Industrial dispensing lines |
As a manufacturer of the full consumable line, cartridges, static mixers, dispensing guns, and tips, Ebestron supplies formats compatible with Sulzer Mixpac (B and C-System), Nordson EFD, 3M, and Cox systems, so a plant can standardize parts across suppliers without re-tooling. Browse the 50 ml dual cartridge, 200 ml cartridge, and 400–600 ml dual cartridges, or pair them with the right epoxy mixing nozzles.
What’s Changing in Two-Part Cartridge Dispensing (2026 Outlook)
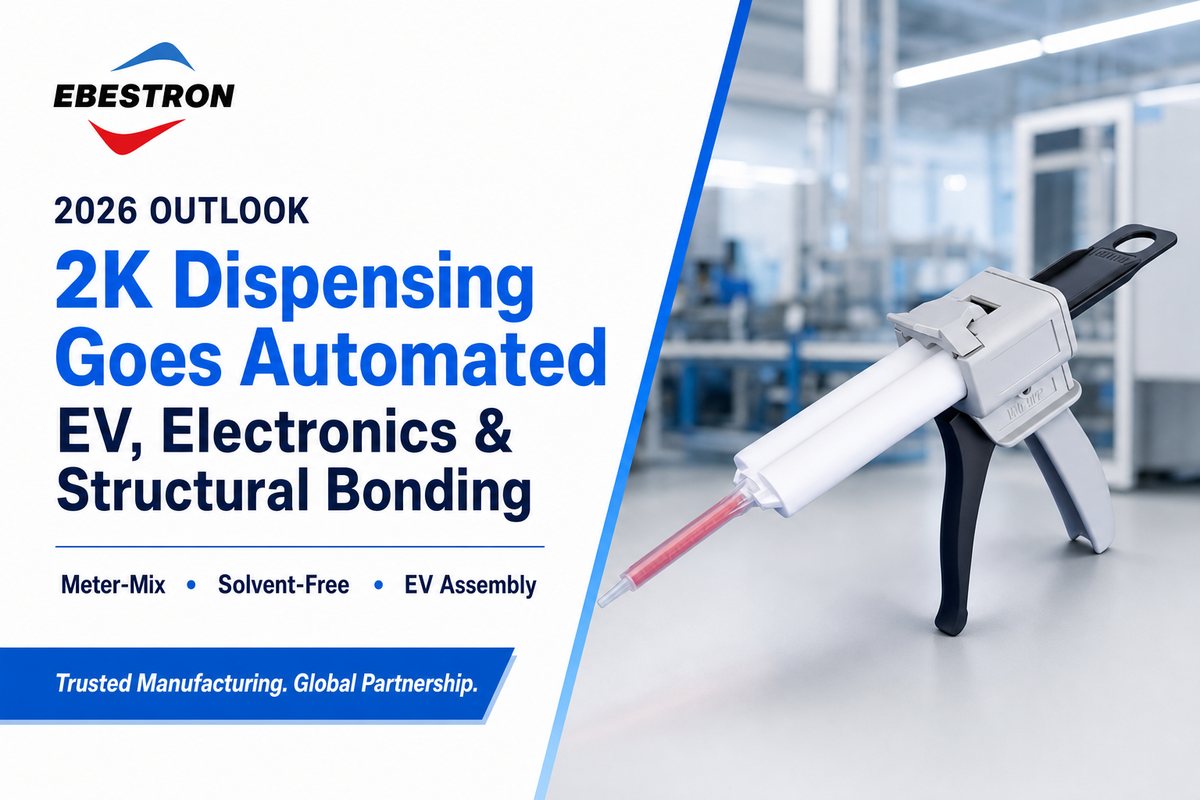
The decisive change for buyers is that two-part bonding is moving into safety-critical, high-volume work, EV battery packs, electronics potting, and lightweight structural joints, where every off-ratio or voided bead carries real cost. That pressure is pushing plants from manual cartridges toward automated meter-mix and closed-loop ratio control, with the cartridge-and-static-mixer format serving as the manual on-ramp and the prototype tool that proves a joint before it’s automated. Structural adhesives are also displacing rivets and other fasteners in vehicle assembly, where two-part reactive systems are gaining ground on composites for fuel economy and crash safety. Solvent-free, low-VOC chemistries are the parallel regulatory driver.
For context, the broader adhesive-dispensing-equipment market is projected to grow at roughly a 3.5% annual rate through the mid-2030s, directional background, not the reason to act. The practical move for 2026 is to standardize on one or two cartridge formats so your gun and mixer inventory stays simple as volumes rise, and to keep a manual-cartridge process documented as the fallback and qualification step behind any automated line.
Frequently Asked Questions
Can you use a two-part adhesive cartridge without a gun?
View Answer
For a very small 50 ml side-by-side cartridge you can sometimes push the plungers by hand for a quick dab, but you sacrifice the even, on-ratio thrust a matched gun provides, and bead control suffers. For anything structural, a dispensing gun is strongly recommended: it advances both pistons in proportion so the static mixer receives material at the correct ratio, which hand pressure rarely manages on a stiff or wide-ratio cartridge.
How much of the first bead should you throw away?
View Answer
Discard about one full nozzle length, or two to three times the volume of your static mixer — a 5 to 8 cm bead on a 50 ml cartridge. That leading bead has not passed through enough mixing elements to reach the correct ratio; it leaves the tip unmixed and will not cure. Keep purging until the bead runs an even color.
Can you stop and restart dispensing partway through a job?
View Answer
Yes. If the interruption is within the work life, release the gun thrust, leave the static mixer on the cartridge, and re-purge a short bead before the next joint to clear material that started to gel. If the pause exceeds the work life, the mixer will cure solid and must be replaced before you continue.
What happens if the mix ratio is off?
View Answer
An off-ratio mix leaves uncured resin or hardener in the bond line, so the joint stays soft, tacky, or weak even after it sets. Don’t try to compensate by adding an extra increment of one part — scrap the bead and re-dispense on ratio.
How long does an opened two-part cartridge last?
View Answer
The cartridge body can last to its printed shelf life if you seal the outlets before the adhesive in them cures and store it cool, dry, and upright. The static mixer, by contrast, is single-use: the material inside gels within the work life. Leave the cured mixer on as a temporary plug, then fit a fresh one and re-purge before the next joint. Before reusing older stock, dispense a test bead — if it will not cure to an even, homogenous finish, the cartridge is spent.
Do all two-part cartridges use the same static mixer?
View Answer
No. Side-by-side and coaxial cartridges, and the Mixpac B versus C-System families, take different mixer inlets and element counts, so the mixer must match both the format and the mix ratio.
Do you need a special gun for a two-part cartridge?
View Answer
Yes — you need a dual-thrust cartridge gun whose ratio matches the cartridge, not a single-barrel caulk gun. A 1:1 gun drives both plungers equally; a 10:1 gun drives one plunger far faster than the other. Using the wrong ratio gun advances the pistons out of proportion and pushes the output off ratio. Manual, pneumatic, and battery-electric versions all exist; choose by viscosity and duty cycle, and confirm the gun seats your cartridge format before the first shot.
Need cartridges, mixers, and guns that fit your line?
Ebestron manufactures two-part adhesive cartridges, static mixing nozzles, dispensing guns, and precision tips compatible with Mixpac, Nordson, 3M, and Cox systems.
Why We Wrote This Guide
Ebestron makes the dual cartridges, static mixers, dispensing guns, and precision tips that two-part adhesives are dispensed through, so the field failures we see returned almost always trace to the same handful of usage steps, an un-purged first bead, unequal pistons, or a mixer left to cure between shots, rather than to the chemistry. This guide put that whole workflow in one place. Reviewed by the Ebestron technical team.
References & Sources
- OSHA Technical Manual, Section III: Health HazardsU.S. Department of Labor
- Methylene Diphenyl Diisocyanate (MDI) Action PlanU.S. Environmental Protection Agency
- Adhesive Joint Degradation Due to Hardener-to-Epoxy Ratio InaccuracyPubMed Central (NIH/NLM)
- Isocyanates: Working SafelyCalifornia Department of Public Health (HESIS)
- ISO 10365:2022, Adhesives, Designation of Main Failure PatternsInternational Organization for Standardization
- US Patent 3,286,992, Mixing Device (two-component cartridge with static mixer)Google Patents
- Dispensing Two-Part AdhesivesAdhesives & Sealants Industry
- Meter, Mix and Dispense Two-Part AdhesivesASSEMBLY Magazine
- Two-Part Epoxy Static Mixer, Introducing Air BubblesEng-Tips Engineering Forum
Related Articles
- How to Choose a 2K Dispensing Gunmatching drive type and thrust ratio to your cartridge
- Static Mixing Nozzle Typesidentifying the right mixer for your cartridge
- Caulking Gun vs Cartridge Dispensing Gunwhy a 2K cartridge needs a dual-thrust gun