Get in touch with Ebestron Company


By CYH
How long does epoxy take to dry? Loctite Instant Mix 5 Minute Epoxy sets in 5 to 7 minutes at 68-77°F (20-25°C), gains enough strength to be usable in about 20 minutes, and lists a typical full cure of 24 hours. The same sheet states that the adhesive has handling strength in 1 hour. These times represent four different stages of a two-part Epoxy system. Pick the time that corresponds to the next operation, whether that is to close the joint, remove a clamp, or put the part to use. Henkel technical data sheet
During the reaction of the components, a bond between resin and hardener develops. This reaction initiates the epoxy resin curing process. The mixed adhesive undergoes distinct stages before the joint reaches full hardness. An epoxy floor, a deep pour and a glued assembly can all feel dry before they’re ready for the next operation. These principles apply to two-part adhesives for joining parts.
What does dry mean for two-part epoxy?
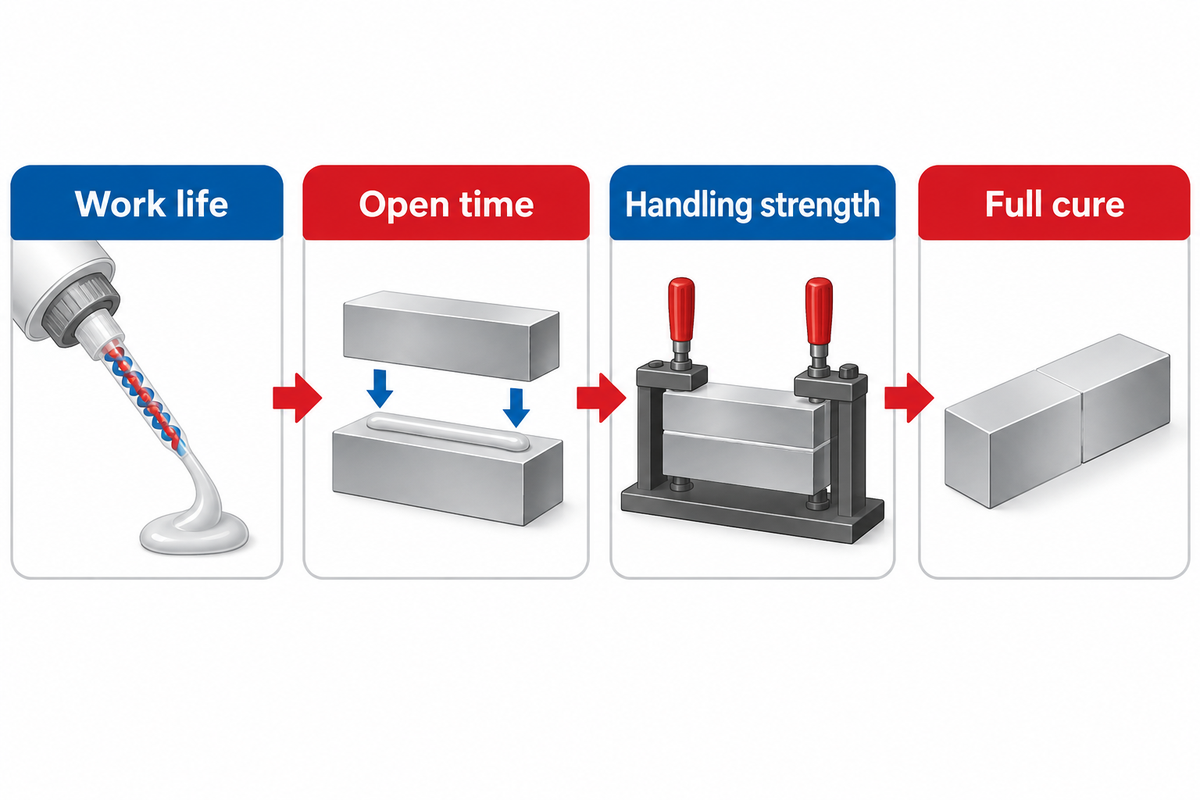
For two-part epoxy, dry can mean set, handling strength or full cure. If you’re working with epoxy, pick the milestone that refers to the next action. Working time is the period when the mixed adhesive is still workable, while open time here is the time available after application to join two surfaces. Set or gel time marks a change in the mixture as curing continues. Handling strength and full cure are end milestones. The DP420 Black technical data sheet defines open time and work life separately.
Three Clocks for One Joint
| Next operation | Timing to check | What to record |
|---|---|---|
| Start dispensing | Working life after mixing | Mix start and test conditions |
| Spread a batch | Pot life for the specified mass | Mixed amount and container |
| Align two parts | Open time or assembly deadline | Time from application to closure |
| Lock the fixture | Supplier closure and fixing instructions | Time at which the joint was secured |
| Check for initial set | Gel or set time | Endpoint named in the technical data |
| Remove a clamp | Fixture time or specified handling strength | Conditions and approved removal criterion |
| Transfer a part | Handling milestone for the move | Support, orientation and disturbance at transfer |
| Sand or machine | Product’s finishing instruction | The intended finishing step |
| Release to service | Full-cure schedule and release criterion | Service conditions and required verification |
The same resin can be dry to the touch in a surface sample while the joint still has strength to develop. A supplier’s full cure label provides a practical endpoint for that material, under stated conditions. The supplier’s label and the degree of chemical conversion describe different things. The clock helps you schedule the work. The approved release criterion tells you when you can proceed with that assembly.
How long do different epoxy adhesives take to set and cure?
At their stated conditions, the adhesives below range from a 5 to 7 minute set for Loctite Instant Mix to a 4 to 6 hour set for J-B Weld Original Professional Size. A 20 minute label on an industrial epoxy may indicate a work life. For 5 minute epoxy, read the heading next to the number first. Leave a blank for a milestone the manufacturer doesn’t specify. The full cure chart keeps time with the product it’s supplied with. Some products list minutes to set and hours to cure.
| Product | Early milestone | Handling or later milestone | Supplier conditions |
|---|---|---|---|
| Loctite Instant Mix 5 Minute Epoxy | 5–7 min set, 20 min typical usable strength | 1 h handling strength, 24 h typical full cure | Set at 68–77°F (20–25°C). The sheet qualifies timing by conditions and thickness. |
| 3M Scotch-Weld DP420 Black | 20 min working time in the US listing | About 2.5 h handling, 24 h full cure | Full cure at 73°F (23°C) per the product page. |
| J-B Weld Original Professional Size | 4–6 h set | 4–6 h before handling, 15–24 h full cure | Manufacturer’s room-temperature example for this product. |
| Permabond ET500 | About 5 min to handling strength | 24 h full cure | Handling at room temperature. The Permabond ET500 technical data table gives the 24-hour full cure at 23°C. |
| WEST SYSTEM 105/206 | 20–25 min pot life, 90–110 min working time as a thin film | 10–15 h to solid thin film, 1–4 days to working strength | Pot-life test uses 100 g at 72°F. The other endpoints retain the sheet’s own labels. |
When calculating how long parts will take to cure, put fixture removal and full cure on separate work order lines. A part can leave a fixture in the afternoon and be held until the next day. A short gel time helps small repairs, but may not help if an operator has to repeatedly align, clamp, and dispense a multitude of joints.
How does the schedule differ for casting or coating?
For epoxy resin projects such as bar tops, UltraClear recommends 72 hours before typical use of its final tabletop flood coat at 75–80°F. Thick pours call for their own schedule. The same supplier’s deep pour instructions give a separate window for the next coat. Check the maximum recommended pour depth and the stated conditions when you plan to demold or sand the surface.
Pouring resin into a mold or coating a table top calls for a different schedule. The depth of a casting affects how much heat the mix retains throughout the cure period. A coating supplier may give a time to apply the next layer, a separate time for light use and a later full cure period. Use the stated depth and endpoint for the exact type of epoxy, especially when planning when to demold or move the piece.
How much time do you have to assemble the joint?
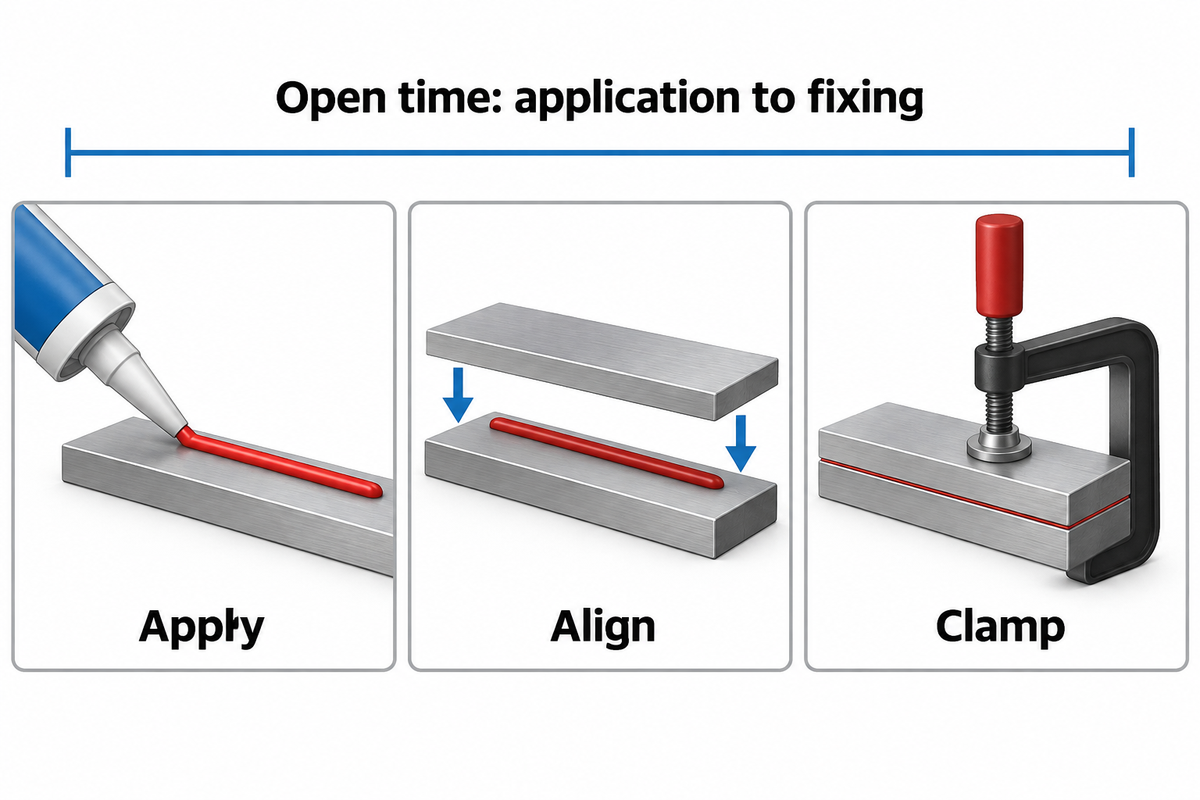
For DP420 Black, the open time is 20 minutes from application to closure and fixing. On the DP420 Black technical data sheet, the measured work life at 23°C is 30 minutes for 5 g, 20 minutes for 10 g and 15 minutes for 20 g. The open time and the work life for the 10 g test match in this example, but their clocks start at different points.
How do you time the work after application?
Let’s assume a dry run takes four minutes to position a bracket, three minutes to align it and two minutes to clamp it. If all three happen after application, they occupy nine minutes. Against the cited 20-minute open time, the arithmetic leaves eleven minutes of planning margin. In this worked example, the nine-minute total uses hypothetical shop times to illustrate the method. If the resin flows well at the gun, that still leaves the question of whether the time to cure meets the assembly schedule. The planning margin still assumes the adhesive and the work piece are in the stated conditions and the mixed material stays workable when applied.
Look for delays the dry run might miss. A short interruption after mixing consumes work life, even if no adhesive reaches the joint. Once the pot life ends, that batch is no longer within the documented process window. A second attempt to align after applying the bead also consumes open time. If a fixture needs a shim or a fastener needs a different wrench, those should be found while the resin and hardener are still separated.
Suppliers can define working life by how the resin flows, how readily it extrudes or when it gels. The published ISO 10364 method record says the specified methods can give different results. When the two candidate technical sheets show different methods, compare the endpoint and test conditions before choosing the bigger number. The full working window matters because a mix can still look fluid as viscosity rises. If the resin thickens before the parts are ready, use the product procedure for expired working time.
When can you unclamp, move, or finish the part?
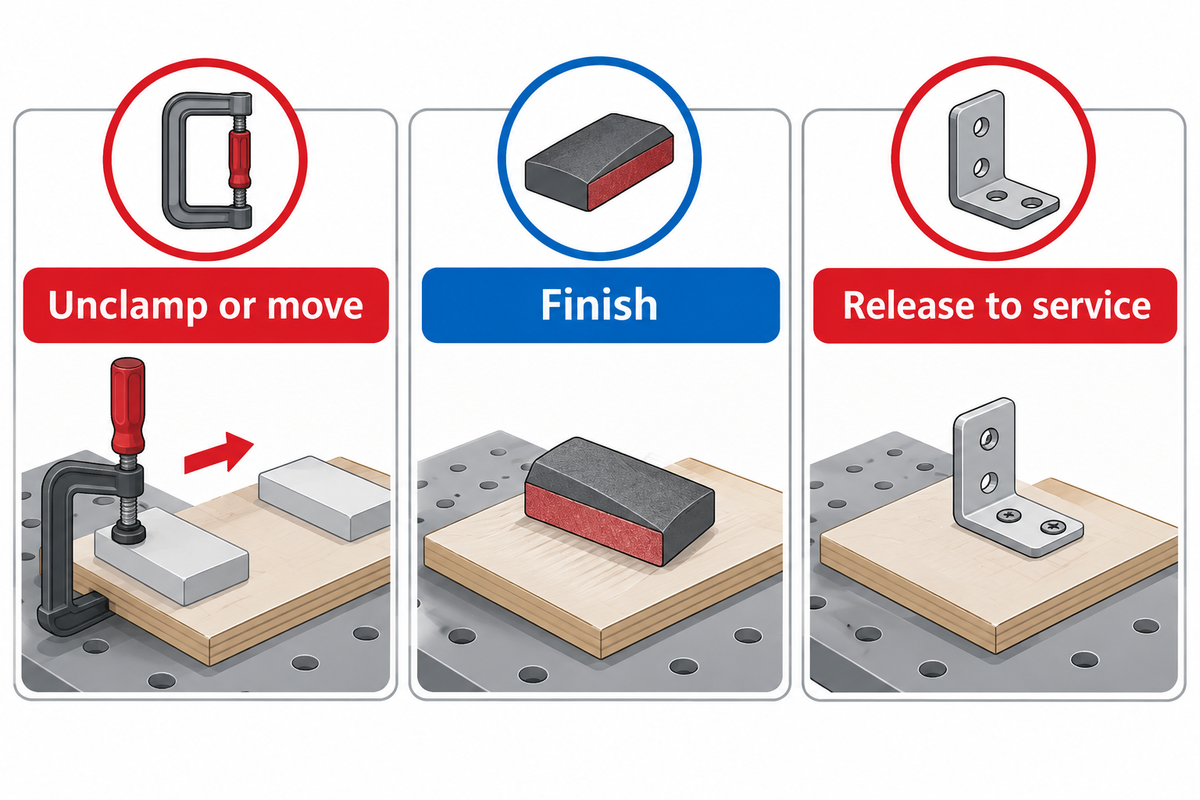
Unclamp or move the assembly when it meets the stated fixture or handling requirement for that operation. With DP420 Black, the current US product page gives about 2.5 hours to handling strength and 24 hours to full cure at its room-temperature condition. This can mean that the part is assembled and moved within one shift while the full-cure hold continues beyond that shift. Start the cure clock at the mixing step and follow any other start step indicated in the product data sheet.
Make the handoff clear. In the case of a tray transfer, determine how the part will be supported. A long part can bend when a person lifts it at one end. Support it during the initial cure period. A sanding operation adds force and local heat, even if the same part was moved successfully in a tray. Use the product data sheet for machining and finishing, and keep the appropriate release criteria at the station where the machining and finishing are done.
Permabond’s curing note explains why fixture time or handling strength can matter for subsequent assembly while full cure takes longer. Lab values have their limitations. ISO 4587 measures lap-shear strength under specified specimen and test conditions. A figure from that test cannot set the allowed load on a different joint. The time for epoxy to cure for movement says little about its capability to support a sustained load after it reaches full strength. Sustained load and service temperature need to be addressed during the application’s own qualification.
How long does it take to finish a same-day job? That depends on the epoxy and what the next station needs to do. Application and clamping can be complete even though the part remains in the cure area. If another operation has to happen before the end of the shift, use that operation’s actual endpoint to schedule the job.
What changes cure time on a real bench?
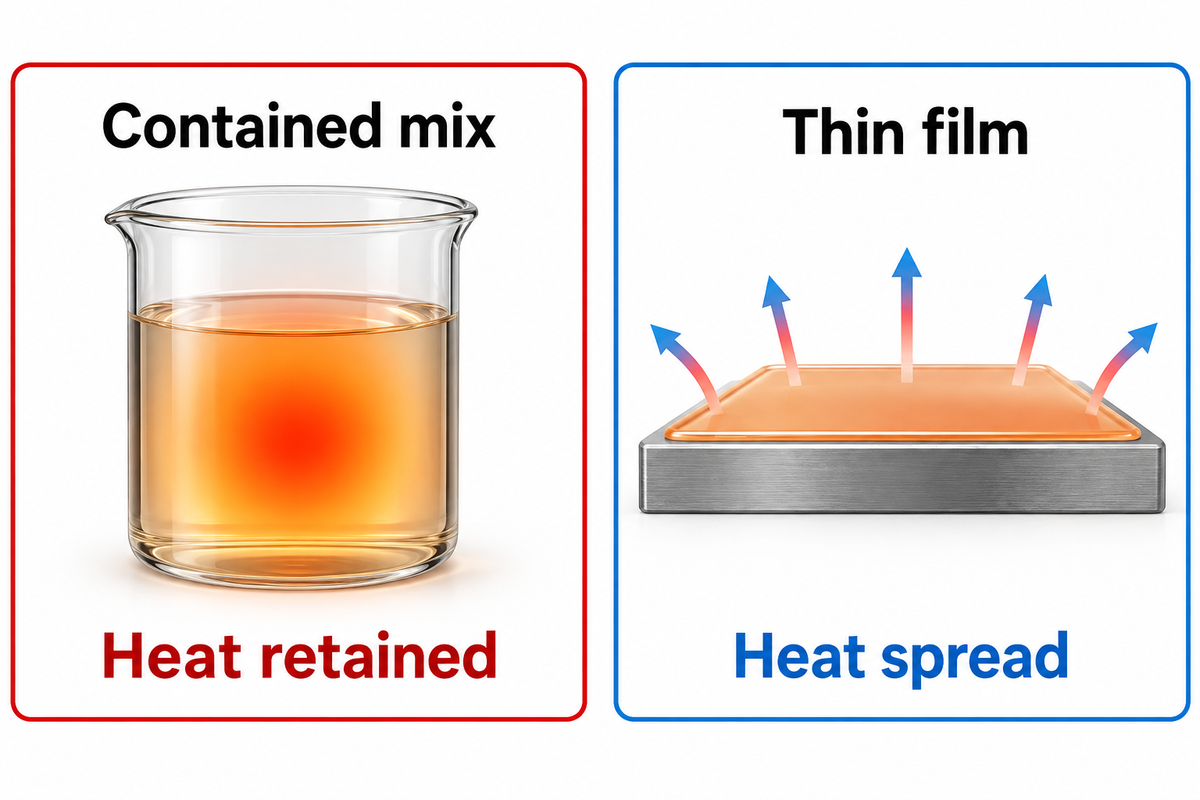
Temperature, mixed mass and geometry influence the working conditions. WEST SYSTEM’s 105/206 sheet lists 20-25 minutes of pot life for a 100 g mix at 72°F and 90-110 minutes of working time in a thin film. The values describe different conditions. The exothermic reaction can generate heat. A contained mix retains more of that heat, whereas thin layers spread it over more surface area.
Measure the work piece and the working environment. A metal bracket brought in from a cold staging area can lag behind the air temperature. If the next batch uses warmer parts or sits in a different fixture, consider that before comparing cure observations. A NIST study of epoxy films used multiple methods to define the effects of time and temperature. In a shop trial, the quickest thing to do is to measure both and compare like with like.
To estimate how temperature affects pot life, begin with the supplier’s rated pot life and use Ebestron’s Pot Life Working-Window Estimator. Use the output as a planning estimate. Then verify the nozzle and cartridge on the actual dispensing cycle. An adjustment in temperature that helps the epoxy cure faster can also shorten the time you have to position parts.
High humidity is relevant when the manufacturer specifies humidity as part of the bonding conditions. A cold floor and a shop-warmed metal bracket require separate temperature readings. Make certain mating surfaces are clean and prepared as specified. When dry surfaces are specified, ensure they’re completely dry before starting. If you find condensation or other contaminants, address that first. A cold part can take longer to reach the stated endpoint. To cure epoxy under heat, follow the approved heating schedule. Heating a mix can reduce its assembly window. Keep excessive heat away from joints. Use a heat gun or torch only if the exact product instructions explicitly call for it. Measure part temperature and adhere to the conditions stated by the supplier.
Why does a joint still feel sticky or set in patches?
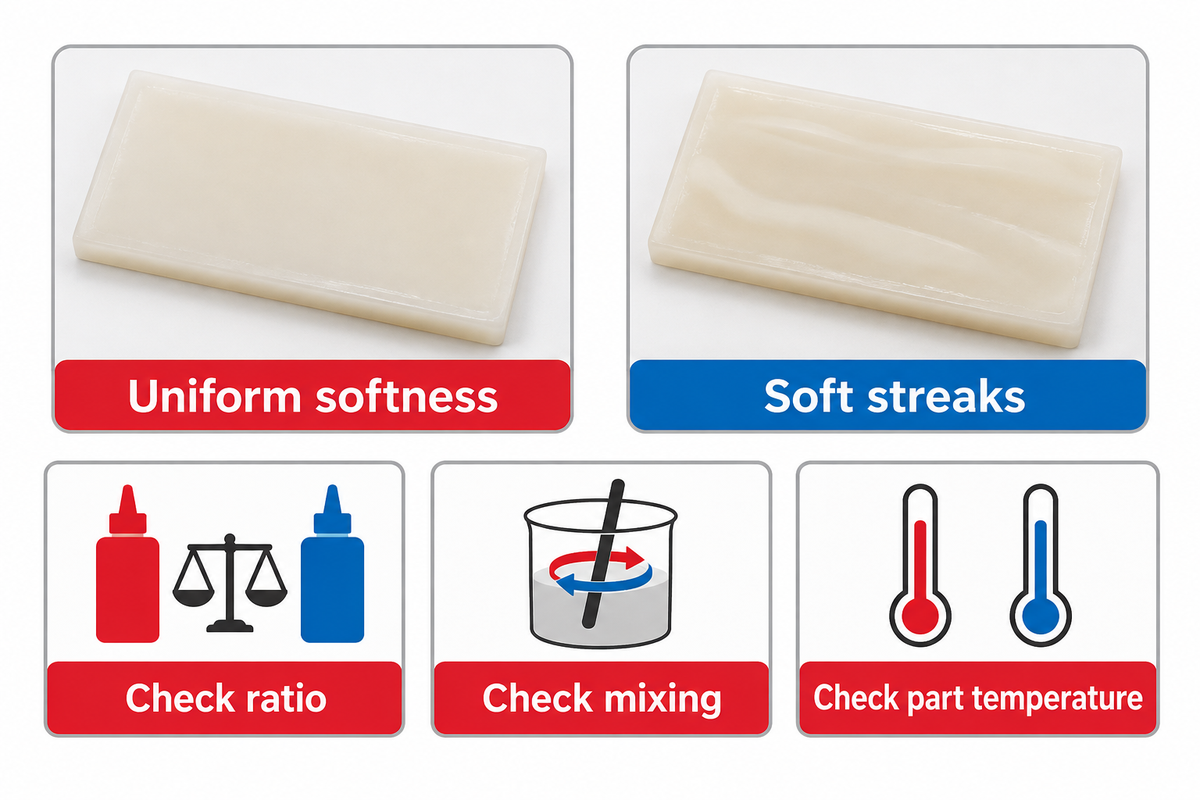
Low temperature, an incorrect ratio or incomplete mixing can leave epoxy uncured. Compare elapsed time and actual part temperature with the product schedule, and check the ratio and mixing. Before starting to mix epoxy resin, check the basis for the ratio. If the resin stays soft across the assembly, look for a condition shared by the samples. Appearance alone may not identify the cause. Handle uncured material according to the product’s safety instructions and assess the bead without touching it directly.
| Observation | First check | Useful comparison |
|---|---|---|
| All samples are uniformly soft | Actual part temperature and elapsed time | Exact product’s cure schedule |
| Hard and soft areas alternate | Mix uniformity and how the bead was laid | Fresh sample made with the same lot and geometry |
| Color streaks in the first shot | Both ports flow evenly and the nozzle is seated | A sample after the documented startup procedure |
| Softness appears after a pause | Idle interval and mixer condition | Fresh bead versus restart sample |
| Cup hardens ahead of joint | Different heat retention and thickness | Coupon with the intended joint gap |
| One material or finish has the problem | Surface preparation and part temperature | Matched specimens of each actual material |
| Mixed adhesive thickens during setup | Mix start and held volume | Repeat after staging the tools and parts |
| Fresh batches differ from one another | Product, lot, ratio basis and process record | Controlled repeat with one variable changed |
| Surface is hard but the joint shifts | Handling or fixture milestone and force during transfer | Repeat under the specified holding conditions |
The RATIO, MIXING and LOW TEMPERATURE checks are discussed in the WEST SYSTEM troubleshooting guide when epoxy hasn’t cured. Increasing the quantity of hardener changes the prescribed proportions. If the schedule is too slow for the job, change the approved formulation or cure conditions. Follow the manufacturer’s rework instructions for any uncured adhesive.
DP420 Black’s technical sheet shows a B:A ratio of 2:1 (by volume) and 2:0.97 (by weight). The numbers on this technical sheet describe the same product and use different measurement bases. The 2:1 ratio is used by volume in the cartridge delivery system, and the 2:0.97 ratio should be used by weight on a scale. All weights and measures should be recorded as shown on the technical sheet. The Part B label should be captured as shown on the cartridge. Use the Weight and Volume Ratio Converter to convert ratios if necessary. Enter the densities of the components in the converter.
What should you check after a pause in dispensing?
Compare a fresh bead with one taken at restart under matching conditions, and record the planned idle interval. Record joint gap, idle time, part temp, adhesive grade and lot, nozzle and cartridge, time since mixing start, cure condition, etc. Comparing the two beads should help to determine if the condition being reviewed occurs only after a restart.
Fresh Bead and Restart Sample
Take the first sample after following the manufacturer’s start procedure, which for 3M DP420 Black includes checking that material flows evenly from both cartridge sides before fitting the EPX mixing nozzle. Use the current instructions for your exact product. For the basics of two-part adhesive cartridge use, see how to use a two-part adhesive cartridge. Take the restart sample after the planned interruption and assess both samples at the same stated process milestone.
If both remain soft, check the common factors first. The time varies with batch conditions, even when the epoxy is designed for the same application. If the fresh sample behaves normally and the restart sample doesn’t, look at the interruption and mixer condition. A good restart sample supports the setup and interval. Repeat the comparison if the formulation, nozzle or planned interval is changed. Compare the epoxy mixing nozzle options and epoxy applicator guns after you determine the required ratio, connection and workflow.
Match the dispenser to your assembly cycle. Send the adhesive grade, cartridge volume and ratio, nozzle connection and expected idle time.
What’s changing in how working life is specified?
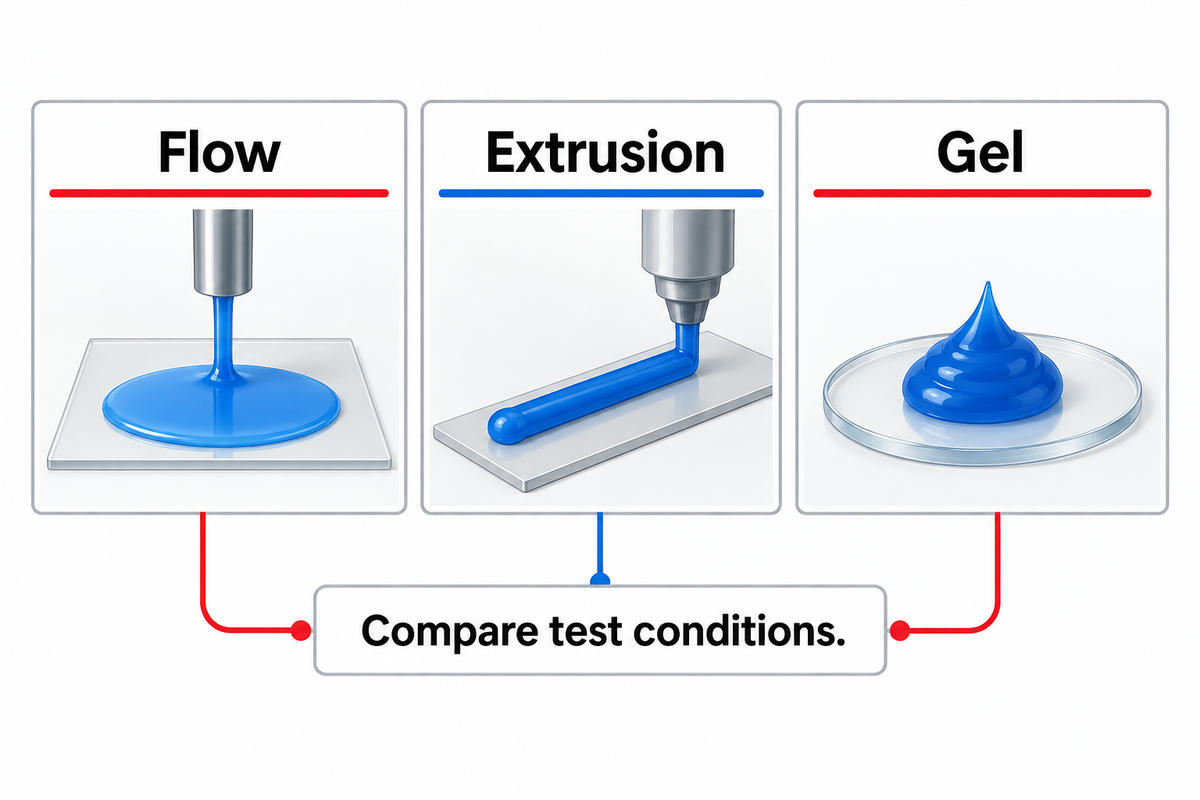
ISO 10364:2024 added a snap-time method for determining pot life. This is the published standard for multi-component adhesives and ISO has a different, separate draft revision. When comparing datasheets, remember that different methods can produce different results. Ask for the endpoint, temperature, sample mass and time reference. If the supplier only specifies a gel time, ask for the assembly window you need.
Frequently Asked Questions
How long does epoxy need to dry before sanding?
Sand when the product reaches its stated sanding or solid-cure milestone. WEST SYSTEM 105/206 lists 10 to 15 hours for its thin-film solid-cure example. WEST SYSTEM describes that solid stage as suitable for dry sanding.
Once a joint can be moved gently, sanding can still put heat and force into it. Check the finishing instructions for that grade. If the sheet gives only set and full-cure times, use the manufacturer’s finishing guidance and ask for an earlier sanding window if the job needs one. Material that has just stopped feeling tacky may still be too soft to sand cleanly. For a clean result, test the finish on a representative coupon before you sand the surface of a production part.
How long does epoxy take to dry on metal?
For J-B Weld Original Professional Size at room temperature, the manufacturer gives 4 to 6 hours before handling and 15 to 24 hours for full cure.
Another epoxy designed for metal can follow a different schedule. If the metal came from a cold room, measure the part temperature before applying a room-temperature timing figure. Keep the surface preparation and cure conditions specified for that product.
How long does epoxy need to dry between coats?
UltraClear gives 12 to 24 hours before recoating its deep pour epoxy within its specified temperature range and at or below 60% humidity.
Use the recoat window for the exact epoxy finish, which can differ from tack-free time. The interval before you can use a finished coating depends on its formulation and temperature. Some systems allow a next coat while the surface is still tacky. The same material may take longer to fully cure after the last coat than it takes to accept the next one. Others require preparation once the previous coat is fully hardened. Follow the coating’s directions for the next pour or thin coat, including any required light sanding. The schedule for bonding two parts can’t tell you when to recoat a floor or countertop.
Can I add more hardener to speed up the cure?
Keep the stated resin-to-hardener ratio. To speed up the curing process, choose an approved faster formulation or follow the heat schedule given for that adhesive.
Why did the epoxy harden in the cup but stay soft in the joint?
A cup can retain reaction heat while the thin joint loses it. Check the actual joint conditions and compare a sample made with the same materials and gap.
References & Sources
- ISO 10364:2024, pot life of multi-component adhesives
- ISO 4587:2003, tensile lap-shear test method
- NIST, Combinatorial Techniques to Measure Curing of Epoxy Films
- Henkel, Loctite Instant Mix 5 Minute Epoxy technical data sheet
- 3M, Scotch-Weld DP420 Black technical data sheet
- Data sheet for WEST SYSTEM, 105/206 epoxy resin and slow hardener